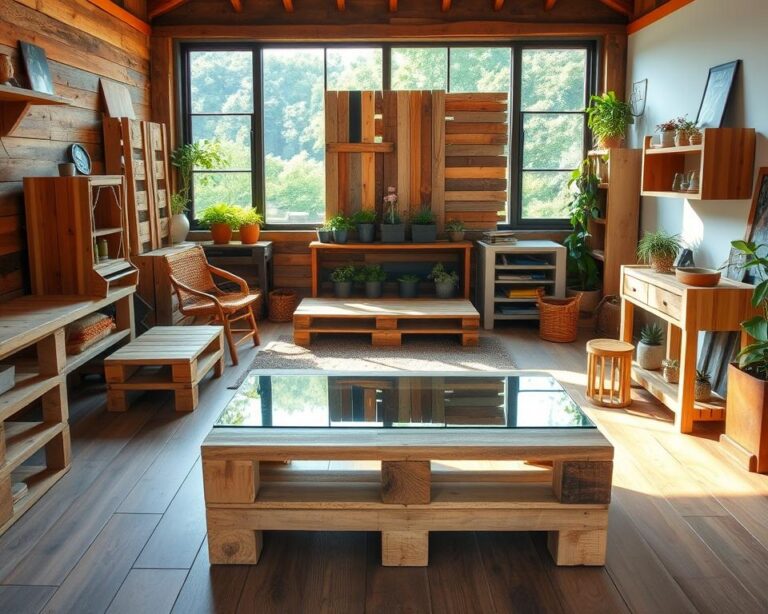
Did you know that over 10 million people in the United States love woodworking as a hobby? This shows how much joy and satisfaction can come from making your own things. If you’ve ever wanted to try woodworking but didn’t know how to start, this guide is for you. It’s made for beginners and shows you easy wood projects. These projects will not only spark your creativity but also teach you how to make DIY furniture.
Each project in this guide is easy to handle and great for learning. No matter if you want to make pretty home decor or useful items, these projects are perfect for beginners. They will give you the confidence to turn your ideas into reality. Get ready to make ordinary wood into amazing things!
Why Choose Simple Wood Projects?
Starting with simple wood projects is a great first step into woodworking. They are perfect for beginners, providing many benefits that make learning fun and rewarding. You can try out easy ideas that match your skills and build your confidence.
Benefits for Beginners
Simple projects are easy for beginners to tackle. They let you learn and grow without feeling stressed. By focusing on the basics, you can improve your skills and feel proud of your work.
Cost-Effective Solutions
These projects don’t need a lot of materials or tools, so they’re budget-friendly. Starting with just the essentials helps keep costs low. As you get better, you might want to get more advanced tools.
Enhancing Creativity
Woodworking is a creative hobby. Working on simple projects lets you try different designs, making things both useful and artistic. It’s a fun escape that boosts your creativity and lets you relax.
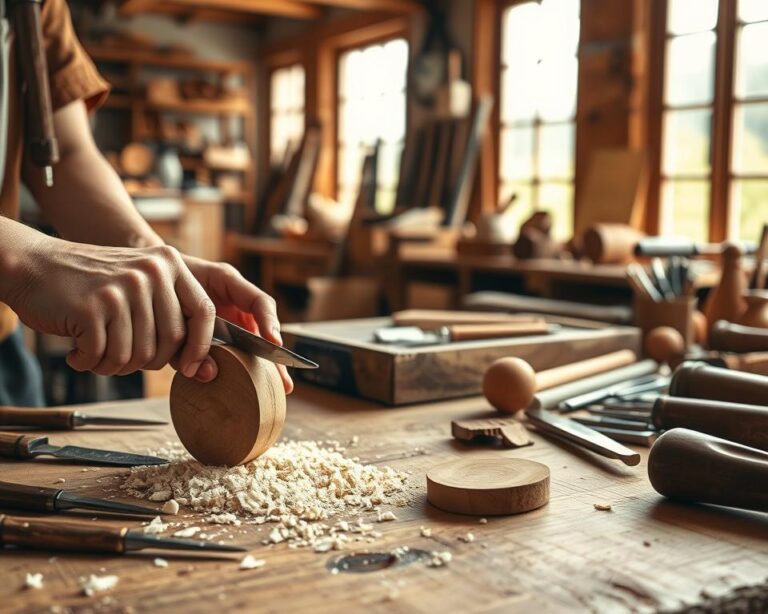
Essential Tools for Woodworking
In woodworking, you need different tools to turn ideas into real things. Whether making your own furniture or doing small wood projects, the right tools matter. Knowing which tools to get first helps make everything easier and more fun.
Must-Have Hand Tools
Start with these basic hand tools:
- Saws: They’re vital for cutting wood the right way.
- Chisels: Great for adding details and carving.
- Hammers: Used to drive nails or put parts together.
- Screwdrivers: Necessary for working with screws.
- Measuring tape: It makes sure your project sizes are accurate.
Essential Power Tools
Power tools make your woodworking faster and more efficient. Think about getting these:
- Drills: They make holes or drive screws easily.
- Sanders: They smooth out surfaces fast, making your work look better.
- Jigsaws: Great for cutting complex shapes and curves.
- Table saws: Perfect for making straight cuts and accurate angles.
Safety Equipment
It’s very important to stay safe while making furniture. Always use these safety items:
- Safety goggles: They keep your eyes safe from dust and bits of wood.
- Earmuffs or earplugs: They help protect your ears from the loud noise of power tools.
- Dust masks: They prevent you from breathing in bad particles.
- Work gloves: They keep your hands safe from cuts and splinters.
Selecting the Right Wood
Choosing the right wood is key to making great wooden pieces. If you’re starting out, soft woods can make things easier and still let you craft beautiful items. Getting to know how to pick your wood can turn simple projects into something rewarding.
Types of Wood for Beginners
Some great wood types for newbies are:
- Pine: It’s easy to find and work with. This wood is light, making it perfect for simple projects.
- Cedar: Cedar smells good and doesn’t rot easily. This makes it top choice for outdoor creations.
- Plywood: Plywood is layers of wood together. It’s stable and good for many kinds of projects.
How to Choose Quality Materials
Choosing quality wood makes a big difference. Look for wood without knots, splinters, or bends. Good grain patterns mean the wood is stronger and lasts longer. Picking the right wood means your projects will look good and stay strong.
Sustainable Wood Options
It’s important to choose wood that’s good for the Earth. Many places sell wood that’s sourced in a way that doesn’t harm the environment. Look for products with a Forest Stewardship Council (FSC) label. This means the wood is cut down in a way that’s okay for the planet. By choosing this kind of wood, you’re helping the Earth and making great items.
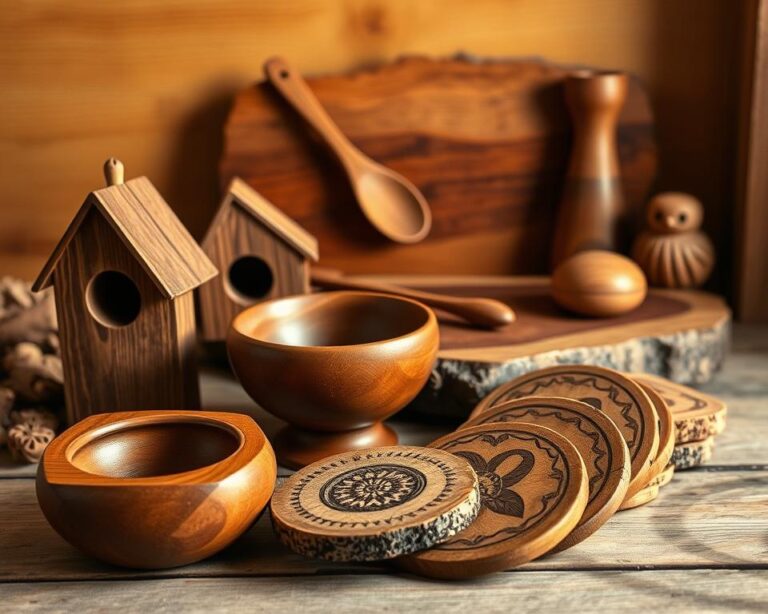
First Project: Wooden Coasters
Making wooden coasters is a great way to start learning about woodworking. It’s a chance to pick up important skills by making something you can use. You’ll learn a lot, setting you up for even tougher projects later on.
Materials Needed
- 1-inch thick wood boards (such as oak or pine)
- Sandpaper (various grits)
- Wood glue
- Wood stain or paint
- Sealant (optional)
Step-by-Step Instructions
- Start by cutting the wood boards into squares, approximately 4×4 inches. This size is ideal for coasters.
- Use sandpaper to smooth the edges and surfaces of the squares. This step ensures comfort when using the coasters.
- Apply wood glue if planning to layer more than one piece for a thicker coaster.
- Let the glue dry completely as per the manufacturer’s instructions.
- Once dry, consider applying wood stain or paint to add a personal touch.
- To protect your coasters, apply a sealant to keep them looking great for years.
Personalization Tips
Add your own touch to the coasters to make them special. Try easy woodwork ideas like putting designs with stencils, carving initials, or painting fun patterns. These personalized coasters can be wonderful gifts or stylish pieces for your home.
Creating a Simple Shelf
Building a simple shelf is a great way to start with woodworking. It’s ideal for beginners wanting to improve their skills and make something useful. You just need a few basic tools and materials, all easy to find. By making this shelf, you will build your woodworking confidence.
Required Tools and Materials
- Wood (1×12 lumber is ideal for a simple shelf)
- Brackets for mounting
- Screws
- Wood glue
- Sandpaper (medium and fine grit)
- Stain or paint (optional for finishing)
- Drill and drill bits
- Level
Assembly Instructions
- Start by measuring the desired length of your shelf. Cut the wood to the appropriate size using a saw.
- Smooth the edges and surfaces of the wood using medium grit sandpaper, followed by fine grit to achieve a polished finish.
- Position the brackets on the wall, ensuring they are level. Mark the locations for the screws.
- Drill holes into the wall at the marked points, securing the brackets in place with screws.
- Place the wood on top of the brackets. If preferred, use wood glue for added stability.
Finishing Touches
Adding stain or paint can make your shelf look even better. Put on an even coat and let it dry well. Remember to sand lightly between coats for a smooth finish. It’s these little details that can turn a simple project into beautiful home furniture.
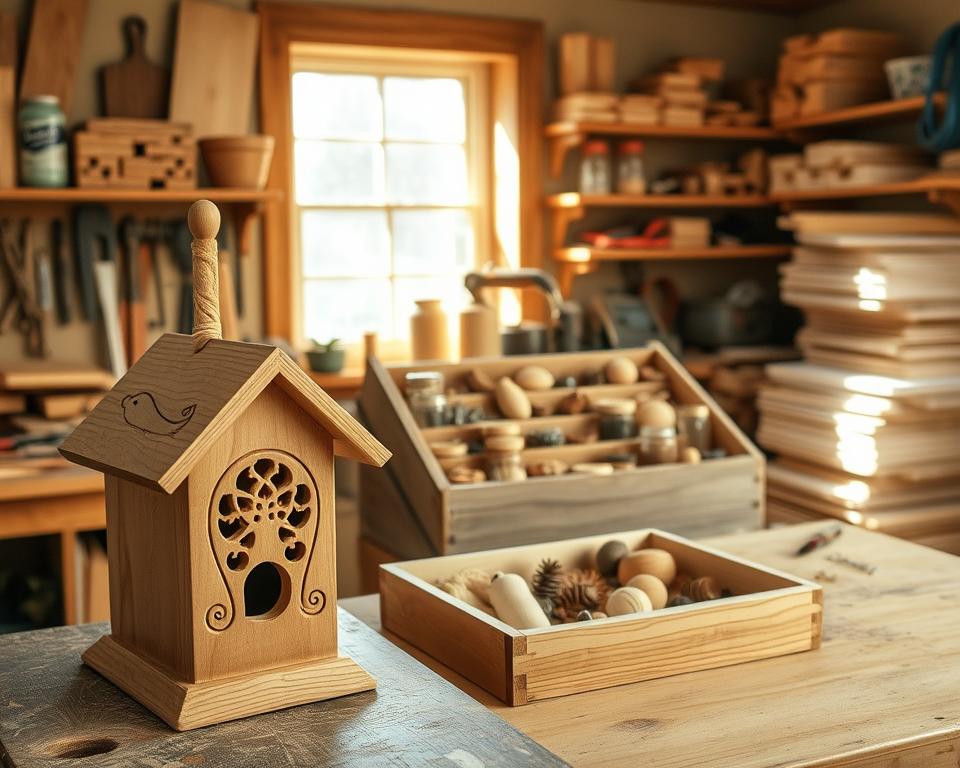
Building a Birdhouse
Creating a birdhouse is a great way to start with woodworking crafts. It lets you learn basic design principles and how to join wood effectively. Before you start building, think about some important design aspects. These will make sure your birdhouse works well and is safe for birds.
Design Considerations
Keep these important factors in mind when making your birdhouse:
- Size: Pick the right size for the birds you want to attract.
- Entry Hole: Make sure the entrance is just big enough to deter predators.
- Ventilation and Drainage: Good airflow and drainage are crucial to keep it dry.
- Material: Use wood that’s free of harmful chemicals to keep birds safe.
Step-by-Step Construction
Here’s how to put together your birdhouse:
- Get your materials ready: you’ll need wood, nails, wood glue, and some tools.
- Cut the wood according to your birdhouse design.
- Put together the sides, back, and front with glue and nails for a strong build.
- Fix the bottom and roof on tightly.
- Drill the entrance and holes for air to flow through as you’ve planned.
- Smooth any sharp edges by sanding and apply a safe sealant for birds if you want.
Recommended Plans
If you’re new to woodworking projects, these plans are a good start:
- Basic Birdhouse Plan: It’s easy to follow with simple cuts and assembly steps.
- Traditional Style: This plan has a timeless look and practical features.
- Decorative Designs: These allow for creativity, so you can add your personal touch with paint or decorations.

DIY Wooden Planter Box
Making a wooden planter box is fun. You can make your garden or balcony special with what you create. This project includes picking the best materials, learning easy cutting ways, and knowing how to put everything together. You’ll also learn how to plant in them, perfect for beginners. It promises fun and pride in your handmade planters.
Choosing the Right Wood
Picking the right wood is key for a strong planter box. Choose cedar or redwood because they resist rot and look good. Pine is cheaper but needs special treatment to last longer. Always go for wood that’s been dried in a kiln. This reduces the chances of it warping or cracking later.
Cutting and Assembling
Here’s how to cut and put together your planter box:
- Measure and Cut: First, decide how big you want your box. Then cut the wood pieces with a saw.
- Assemble the Frame: Place the cut pieces on a level surface to form the box. Secure them at the corners with screws or nails.
- Add Drainage Holes: Drill some holes at the bottom for water to escape. This keeps the roots healthy.
- Finish the Edges: Smooth out any rough spots to make your planter safe and nice to look at.
Planting Suggestions
Picking the right plants makes gardening easier for beginners. Here are some good choices:
- Herbs like basil, parsley, and mint do well in planters and are easy to care for.
- Flowers such as marigolds and petunias bring color and are simple to grow.
- Vegetables like lettuce and radishes are great for small spaces and grow quickly.
Crafting a Picture Frame
Making a picture frame is an excellent start for beginners in woodworking. You will learn how to measure, cut, and finish wood. All these steps help you create a lovely decor piece for your house. Let’s look at what you need to begin.
Materials and Tools
First, collect these materials and tools:
- Reclaimed wood for a rustic touch
- Wood glue for strong adhesion
- Paint or stain to enhance aesthetics
- Varnish for a protective finish
- A saw (circular or hand saw) for cutting
- A drill for making holes
- A sander to smoothen the edges
- Measuring tape for precision
- Clamps to hold pieces together
- Safety equipment: safety goggles, hearing protection, dust mask, and gloves
Measuring and Cutting
Measure the frame size you want first. Use the tape measure for accurate measurements. Accurate measurements make your work look professional. Then, cut the wood to these lengths. Always check your measurements again before cutting to avoid mistakes and fit issues.
Adding a Finish
After putting it together, it’s time to finish your frame. You can paint or stain it for a unique look. Then, apply varnish to protect the wood and make it last longer. This step helps prevent damage over time. For more on similar projects, see this guide.
Wood Projects for Kids
Woodworking crafts are a great way for kids to get creative and learn new skills. By focusing on safety, kids can safely explore their ideas through simple woodworking projects. These activities offer a fun learning experience, combining creativity with skill-building.
Safety Tips When Working with Children
- Always keep an eye on kids when they use tools.
- Give them tools that fit their hands for safer use.
- Make sure kids wear safety goggles to protect their eyes.
- Teach them the value of keeping their workspace tidy to prevent accidents.
- Talk clearly about the safety rules before starting any project.
Simple Ideas for Kids
- Bird feeders from old wood can bring birds to your yard.
- Create mini benches for dolls or stuffed toys as a fun project.
- Designing wooden toys offers many choices in styles and colors.
- Wooden puzzles can make kids think harder and solve problems.
Projects That Encourage Learning
Taking part in woodworking teaches kids useful skills and appreciates craftsmanship. They can learn about measurements and patience through simple projects. Having them keep a journal of their projects boosts their planning skills. It also helps them see how much they’ve improved in their woodworking.

Maintenance and Care for Wood Projects
To keep your wood crafts beautiful and functional, you need regular maintenance. The right care makes them last longer and look better. We’ll talk about how to finish, clean, and fix common problems with wood projects.
Finishing Techniques
Putting a finish on your wood projects helps them resist damage. Here are some top finishing methods:
- Oil Finishes: They soak into the wood, making it look natural and well-kept.
- Varnishes: Create a tough surface that’s good against moisture. Perfect for items used outside.
- Shellac: It dries fast and gives a nice shine, ideal for things kept indoors.
Cleaning and Upkeep
Clean your wooden things often to keep them looking good. Here’s the best way to do it:
- Wipe them gently with a soft, moist cloth. Avoid strong chemicals that can harm the wood.
- Use a proper wood cleaner for tough dirt. Make sure it’s okay for your type of wood.
- Think about reapplying the finish now and then to protect the wood.
Repairing Common Issues
Wood projects can get scratched or suffer from a bit of water damage over time. Here’s how to fix these issues:
- Scratches: Hide small scratches with a touch-up marker or some matching stain.
- Water Rings: Rub a mix of baking soda and water gently over the stains to remove them.
- Loose Joints: Fix them with some wood glue. Clamp until dry as recommended.
Joining the Woodworking Community
Becoming part of the woodworking community boosts your skills and love for the craft. Meeting others with the same interests opens up new learning opportunities. Joining local workshops, online forums, and following top woodworkers can make your woodworking journey richer.
Local Workshops and Classes
Local workshops offer invaluable hands-on learning. You get to learn crucial techniques and ask questions to skilled woodworkers. They provide everything from beginner tips to advanced project guidance, fitting all skill levels.
Online Forums and Resources
Online forums are great for sharing projects and getting advice. They keep you updated on the newest woodworking trends and ideas. Websites and social media offer plenty of tutorials, tips, and project inspiration.
Following Influential Woodworkers
Tracking leading woodworkers brings you fresh ideas and inspiration. These experts often share their know-how through blogs or YouTube, highlighting their creative process. By watching their work, you’ll find new motivation and deepen your woodworking understanding.
Conclusion: Your Woodworking Journey Awaits
Your woodworking adventure is only starting. Every project, from simple tasks to complex designs, will boost your skills. Practice and creativity are key. Keep trying new beginner woodworking projects. This way, you’ll grow more confident and skilled.
Encouragement for Future Projects
As you get better, don’t be scared to try harder stuff. Trying new techniques and styles can make you love woodworking even more. And remember, there’s a special joy in finishing a project, so keep challenging yourself with what you make.
Exploring Advanced Techniques
Looking to get better? Check out online woodworking tutorials. They are full of tips and sparks for your projects. Talking and learning from people who make stuff can also help a lot. So, dive into the woodworking community and share what you know.
Resources for Further Learning
Whether it’s going to workshops, joining forums, or watching how-to videos, there are so many ways to learn more. Fully commit to your woodworking path. Remember, every expert started as a beginner. With every new skill, you’ll open the door to rewarding projects ahead.