Americans use over $300 billion each year on decorating their homes. One of the top trends is making rustic wood signs. They’re loved for their charm and how they can change a space. With simple tools and three easy steps, you can make reclaimed wood into personalized signs. These add character and a cozy feel wherever they’re placed.
Farmhouse style signs or messages that inspire fit well both inside and outside the house. This guide shows how simple it is to create these signs. Your creations will not just wow your friends and family. They’ll also make your home feel more inviting.
Introduction to Rustic Wood Signs
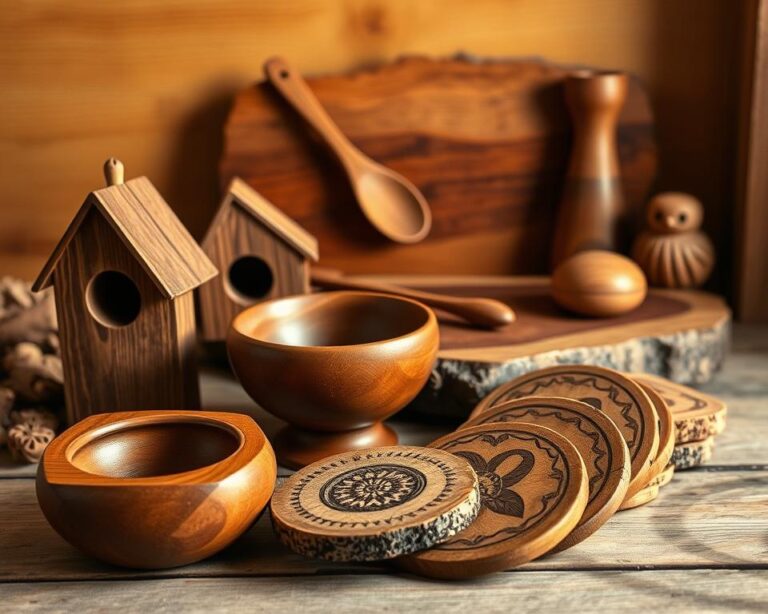
Rustic wood signs bring a special charm to your home. They are made mostly from reclaimed or distressed wood. This gives them a unique look full of texture and character. They’re great for anyone who loves handmade decor. You can choose different designs and finishes to match your style and add to your rustic home vibe.
What Are Rustic Wood Signs?
These signs are made from types of wood like reclaimed, pine, and cedar. They are strong, last long, and are good for the environment. You can find them with fun quotes or messages that make your space more welcoming. They’re all about unique, handmade charm that adds personality to your decor.
Why Choose Rustic Decor?
Rustic decor makes your home feel cozy and inviting. It’s all about warmth, being real, and connecting with nature. Rustic wood signs add beauty and start conversations, showing off your style. By trying different rustic techniques, like distressing or staining, you can make your wood signs stand out even more. For great tips on rustic crafting, take a look at this guide on creating rustic projects.
Step 1: Choose Your Wood
Choosing the right wood is key to making beautiful rustic wood signs. The wood type affects both how it looks and how long it lasts. For a rustic feel, think about using reclaimed wood to add special character to your decor. Different woods make each project stand out in its own way.
Types of Wood for Rustic Signs
Some woods are just right for making rustic signs:
- Reclaimed Wood: This wood comes with a story, perfect for a vintage look.
- Barnwood: It’s tough and gives a rustic feel with great texture.
- Pallet Wood: Easy to get, this wood is good for the planet and great for crafts.
- Old Fencing: Using old fencing can bring a tough charm, great for outside decor.
Sourcing Your Materials
Where you get your materials can make your wooden signs stand out. Here are good places to start:
- Thrift stores: You can find unique items to turn into special signs.
- Salvage yards: Full of reclaimed wood perfect for your projects.
- Local construction sites: Asking around might lead you to the perfect piece.
Step 2: Design Your Sign
Designing your custom rustic signs is fun. You get to show your unique style while sharing your message. Pick fonts and images carefully. They make your wood signs look better and match the farmhouse style you want.
Choosing the Right Font and Style
Choosing the right font makes your sign look good. Rustic, hand-lettered fonts are perfect for wood. Pick fonts that feel warm but can still be read easily. Mix decorative fonts with simple ones to make your message clear.
Incorporating Images or Symbols
Images or symbols make your sign stand out more. You can use seasonal pictures or family names to make it more personal. Use tools like Canva or Cricut to put your designs on wood easily.
| Font Style | Characteristics | Best For |
|---|---|---|
| Hand-lettered | Warm, personalized feel | Family names, welcoming phrases |
| Block letters | Bold and easy to read | Directional signs, instructions |
| Script fonts | Elegant and flowing | Special occasions, quotes |
| Vintage styles | Classic, nostalgic appeal | Farmhouse décor, established dates |
Step 3: Crafting Your Sign
Making your own wooden signs is both fun and rewarding. It lets you add a personal touch to your space. First, make sure you have all the tools you’ll need. These tools help your project look great and last a long time.
Essential Tools You’ll Need
- Miter saw for cutting wood to size
- Drill for adding holes or mounting brackets
- Sandpaper for smoothing edges
- Paint brushes for applying paint or stain
- Wood glue for securing pieces together
Step-by-Step Crafting Process
Got your materials and tools? Now follow these steps to make your sign:
- Start with a clean, well-prepared wood board.
- Use the miter saw to cut the wood into your desired shape and size.
- Sand the edges and surfaces for a smooth finish.
- Drill any necessary holes for mounting or decorative elements.
- Apply your choice of paint or stain, using brushes to achieve the look you desire.
- Assemble all pieces, ensuring everything is securely attached with wood glue.
Tips for Finishing Touches
For signs with more personality and longer life, try these ideas:
- Distress the paint for a vintage look.
- Add a protective clear coat to guard against wear and tear.
- Use natural elements like twine or wood slices for added rustic charm.
Personalizing Your Rustic Sign
Personalization makes your rustic wood signs truly one-of-a-kind. Adding elements that show off your unique style works wonders. Ideas like family names, important dates, or favorite quotes can make your sign more special.
Making It Uniquely Yours
Stencils or custom vinyl lettering can make your signs look sharp and professional. Pick fonts and styles that you love to let your creativity shine. A warm greeting or a meaningful message can make your space more inviting.
Adding Meaningful Quotes or Sayings
Adding quotes or sayings to rustic wood signs can make them more meaningful. You could choose inspirational messages or funny sayings. Think about the vibe you want at home or in your garden and pick quotes that match. This makes your decor more personal and interesting to your visitors.
| Type of Personalization | Description | Examples |
|---|---|---|
| Text | Custom messages, family names, dates | “Smith Family”, “Established 2022” |
| Fonts | Style of lettering used | Cursive, Bold, Serif |
| Graphics | Images or symbols accompanying text | Hearts, Stars, Nature motifs |
| Color | Choice of colors for text and background | Warm tones, Neutral shades |
Adding these elements makes your rustic wood signs visually stunning and personally meaningful. Taking the time to carefully choose each detail makes the crafting process enjoyable. This way, your sign becomes distinctly your own.
Where to Display Your Rustic Wood Signs
Finding the perfect spot for your rustic wood signs makes a big difference in your space. These signs bring a special touch to any area, whether you’re decorating inside or outside. Think about how they fit with your home’s rustic style. Putting them in just the right place can make your home feel more welcoming.
Indoor vs. Outdoor Locations
Inside your home, rustic wood signs can brighten up walls in living rooms, kitchens, and hallways. Outside, they look great in gardens, on patios, and porches. Whether you hang them indoors or outdoors, they highlight the beauty and effort put into making them.
Best Practices for Hanging Signs
When hanging your signs, doing it right means they’ll last longer. Use the right hooks or supports that can hold their weight. This helps prevent any damage from wind or wear and tear. Place your signs where people can see and enjoy them without any trouble.

Maintenance and Care for Rustic Signs
Caring for your rustic wood signs properly keeps them beautiful for a long time. Whether you have them inside or outside, it’s important to look after them well. Doing so will ensure they stay attractive for years.
Cleaning and Preservation Tips
To clean indoor signs, just dust them now and then with a soft cloth. If you’re dealing with humidity or moisture, a gentle wood cleaner is your friend. For those outdoors, a weather-resistant sealant will keep them safe and sound.
This not only protects them but also keeps them looking good.
Dealing with Weather Elements
Outdoor signs need extra care because of the weather. Check them often for any wear or damage. If they’re cracked or peeling, fix them right away. A good wood preservative keeps them safe from rain, snow, and sun.
That way, they’ll continue to look great, just like when you first got them.
| Maintenance Task | Indoor Signs | Outdoor Signs |
|---|---|---|
| Dusting | Weekly with a soft cloth | Not applicable |
| Cleaning | Use a gentle wood cleaner | Seal with a weather-resistant coating |
| Inspection | Monthly for wear and tear | Bi-weekly for weather damage |
| Preservation | Maintain humidity levels | Apply UV protective coating |
Popular Themes for Rustic Wood Signs
Themes impact your rustic wood signs a lot. Focusing on family and home gives out loving messages. Seasonal themes make your holiday decorations stand out. Each season, from the warmth of fall to winter’s joy, offers a unique design for celebrating.
Family and Home Themes
Family and home themes on rustic wood signs strengthen family ties. You might see phrases like “Family, where life begins and love never ends.” Or “Home Sweet Home” welcoming messages. These signs bring warmth and memories, ideal for family times or just everyday living.
Seasonal and Holiday Themes
Seasonal themes on rustic wood signs really pop. They’re perfect for holiday decorating, with designs that capture the season’s essence. Look for signs with fall leaves, winter snowflakes, or spring flowers. These details make your holiday decor special.
Make your holidays merry with signs that have personal messages for Thanksgiving or Christmas. These signs add a special seasonal feel to your home all year long.

Inspiration for Your Rustic Wood Signs
Finding the right inspiration is crucial for crafting unique rustic wood signs. You can find many ideas online to improve your home’s rustic look. Looking at these resources will help you think of new ideas.
Exploring Online Resources
Instagram and Pinterest are full of ideas for wood signs. There, you can see what experts are making and save pictures that you like. DIY websites offer how-tos and tutorials to spark your creativity. Just searching online can give you plenty of ideas to work with.
Local Craft Fairs and Workshops
Going to local craft fairs can open your eyes to new decor ideas. You’ll see different artists’ work and can learn from them. Workshops let you try out new tools and materials. Meeting others who love DIY can inspire you and lead to new friends.
Conclusion: Embrace Your Creativity
Creating rustic wood signs is not just a task; it’s a fulfilling journey. It encourages you to tap into your creativity. These handmade wooden signs add charm and character to your home. They let you show off your personal style, too. When you design and make each sign, you feel a rewarding sense of accomplishment. It turns your ideas into real decor items.
Final Thoughts on Rustic Wood Signs
As you start this DIY adventure, keep in mind that anything is possible. Choosing the right wood and picking inspiring quotes counts a lot. Every detail makes your rustic wood signs unique. It’s a chance to show your personality and values in your home decor. This makes each piece not just a decoration, but a story about you.
Encouragement to Get Started
So, get your materials ready and find some time to craft your wood signs. Let your imagination soar as you turn raw wood into pieces that mean something. You’ll see that this activity does more than make your home look good. It feeds your soul, too. Dive into your creativity and let your handmade signs reflect who you truly are.