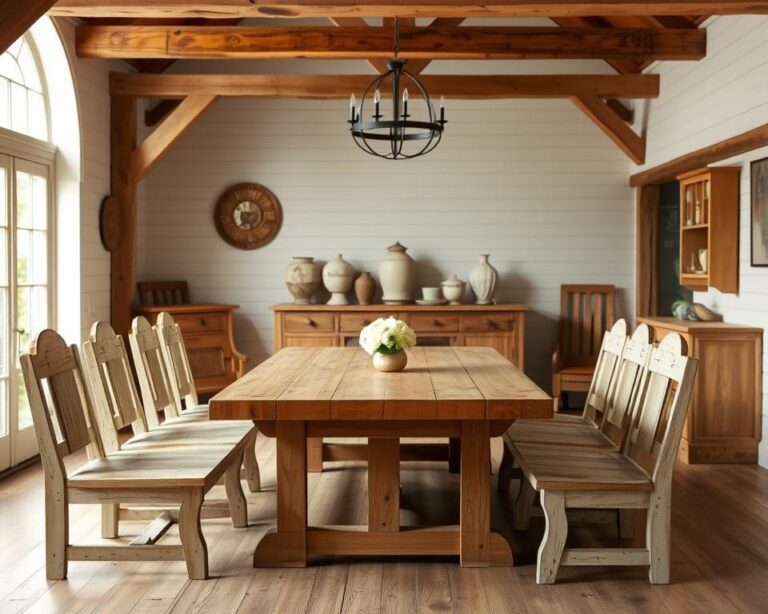
Over 80% of Americans think breakfast is the most important meal. So, let’s make your mornings better with a wooden breakfast tray! Crafting a wooden tray adds charm to your kitchen and improves breakfast-in-bed moments. Follow this easy guide to create a beautiful tray. Whether it’s a lazy weekend or a special day, a wooden tray makes mornings special.
Understanding the Purpose of a Wooden Breakfast Tray
A wooden breakfast tray adds beauty and function to your mornings. It brings a cozy feel to breakfast time. Not only does it look good, but it also helps carry meals and drinks safely.
Benefits of Using a Wooden Tray
Wooden trays are tough but light, easy to carry when full. They keep tables safe from messes and are simple to clean. Their natural beauty fits any style, making them practical and stylish.
Wood trays last a long time, surviving daily wear and tear. This makes them a smart choice for any home’s kitchen or dining area.
Ideal Uses for Your Wooden Tray
Wooden trays make breakfast in bed special for loved ones. They help tidy up spaces by holding items like remotes. They also add charm to your decor.
During holidays, these trays are great for showing off decorations or serving treats. They’re truly versatile, enhancing your home’s functionality and appearance.
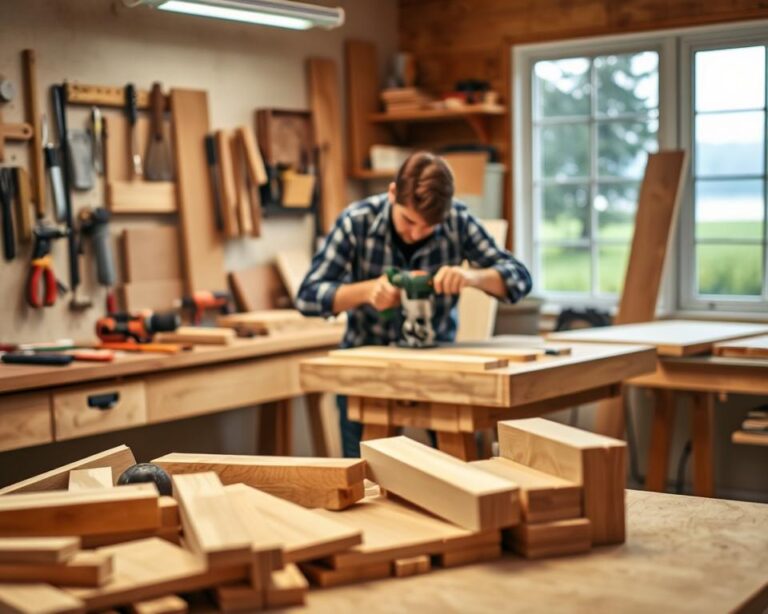
Essential Tools and Materials You’ll Need
To make a wooden breakfast tray, you need the right tools and materials. Quality tools make the job easier. Look for materials at local hardware stores or use leftover wood. This saves money and enriches the crafting experience.
List of Tools Required
- Jigsaw: Ideal for cutting curved shapes and detailed designs.
- Drill: Essential for creating holes and securing screws.
- Clamps: Helps to hold pieces together while assembling.
- Measuring Tape: Necessary for accurate dimensions.
- Screwdriver: Used for fastening screws into place.
- Sandpaper: Important for smoothing rough edges.
- Paintbrush: Needed if applying stains or finishes.
Recommended Wood Types
Choosing the right wood is key for a good serving tray. Here are your best bets:
| Wood Type | Suitability | Appearance |
|---|---|---|
| Pine | Easy to work with and readily available | Light color with fine grains |
| MDF (Medium Density Fiberboard) | Cost-effective and smooth surface | Uniform appearance, ideal for painting |
| Birch | Durable and offers a fine finish | Rich color variations, attractive grain |
| Oak | Strong and resistant to wear | Beautiful grain patterns, sturdy look |
Preparing the Wood for Your Tray
Making a wooden breakfast tray starts with detailed steps for top-notch results. It’s key to plan your cuts to get the right size. This part will show you important skills for measuring and cutting wood. By following these steps, you’ll make a sturdy and beautiful tray.
Measuring and Cutting the Wood
First, pick the type of wood you want for your tray. Measure it carefully with a tape measure. Mark where you will cut with a pencil for precise cuts.
- Use a square to check the corners for 90-degree angles.
- Cut straight lines using a circular saw or miter saw.
- If possible, perform a test cut on a scrap piece to enhance precision.
Cutting wood takes patience and attention to detail. Make sure each piece is cut evenly for a perfect fit. Check the edges for any roughness or splinters to fix before the next step.
Sanding for a Smooth Finish
After cutting the wood, sand the edges and surfaces. This removes rough spots. Start with coarse-grit sandpaper, then use finer grits for a smooth finish.
- Sand in the direction of the wood grain to avoid damage.
- Be thorough around edges where splinters may occur.
- Consider using a sanding block for flat surfaces to maintain even pressure.
For a great look, sand the tray well before putting it together. A smooth tray looks better and is nicer to use.
| Wood Type | Durability | Ease of Cutting | Sanding Difficulty |
|---|---|---|---|
| Pine | Moderate | Easy | Easy |
| Oak | High | Moderate | Moderate |
| Maple | High | Moderate | Hard |
| Birch | Moderate | Easy | Easy |
Designing Your Tray
Designing wooden trays means choosing the right size and shape is key. It affects how it looks and works. A tray that’s the right size makes serving better. Whether you’re serving breakfast in bed or keeping things tidy on a coffee table, knowing the right size matters.
Choosing the Right Size and Shape
Think about what you’ll use the tray for to pick its size. A breakfast tray might need to be bigger than one for drinks. You can choose from rectangles, rounds, or hexagons. Each shape has its own use. Picking a shape lets you make the tray fit your style.
Personalizing the Design with Artwork
Adding your artwork to a wooden tray makes it special. You can paint, stencil, or wood-burn designs on it. Even simple things like monograms or quotes can make it unique. These personal touches combine style with usefulness, making each tray one-of-a-kind.
Assembly of Your Wooden Tray
Putting your wooden tray together is an important step. After you’ve cut and prepared each piece, you need to focus on putting them together. The tray’s strength and how long it lasts depends on how well you attach the parts.
Joining the Pieces
Start by laying out all the pieces. Make sure the sides, bottom, and any handles are in the right place. You can use wood glue or screws to join these parts. When using glue, clamp the pieces together until the glue is dry. If you’re using screws, make sure to drill holes first to avoid splitting the wood. This makes your tray stable and gives it a neat look.
Tips for Securing the Tray Firmly
To make your wooden tray last longer, here are some tips:
- Reinforce Joins: Add corner brackets for extra strength, especially if you’ll carry heavy things.
- Check for Flatness: Make sure the tray stays flat as you put it together. This avoids a wobbly tray.
- Let it Dry: Give the glue enough time to dry before moving the tray. Rushing this step won’t give you a strong bond.
- Sand Edges: After the tray is put together, smooth out any rough edges. This will make your tray look better.
By following these steps, you’ll create a tray that’s both beautiful and useful. Remember, taking your time to secure the parts well leads to a sturdy and practical tray.
Finishing Touches for Your Tray
Applying the right finish can really make your wooden tray stand out. It’s vital because it not only improves its look but also shields the wood from damage. There are various wood stain options to bring out a unique look. They help your tray fit in with your home’s style. A good finishing process makes the tray both beautiful and long-lasting.
Staining or Painting Options
Choosing to paint or stain your tray depends on the desired result. Stains highlight the wood’s natural beauty and color. This keeps the wood’s real look. On the other hand, painting offers more color choices and finishes. Let’s dive deeper into these choices:
| Wood Stain Options | Description | Advantages |
|---|---|---|
| Oil-based Stains | Deep penetrates wood, accentuating grain. | Long-lasting color, water-resistant. |
| Water-based Stains | Quick-drying, easy to clean up. | Low odor, non-toxic. |
| Gel Stains | Thicker consistency; sits on the surface. | Great for vertical surfaces, minimal drips. |
| Paint | Opaque finish; completely blocks wood grain. | Variety of colors, matte to glossy finishes. |
Sealants to Protect the Wood
After staining or painting, it’s crucial to use a sealant. Sealants keep moisture out and boost durability. This step is key, especially if the tray will serve food. There are several sealant options:
- Polyurethane: Super resistance to water and scratches. Great for items that get a lot of use.
- Varnish: Creates a sturdy finish. Best for trays that are more for show.
- Food-safe finishes: A must-have if the tray will hold food.

Creating Handles for Your Tray
Every wooden breakfast tray needs handles. They make the tray look good and are very practical. When picking a handle style, you have many choices that can make your tray both useful and stylish. This part will show you different handle ideas and how to put them on.
Different Handle Design Ideas
There are lots of cool ways to design handles for your wooden tray. Here are some popular ones:
- Cutout Handles: These are carved in the tray’s sides for easy holding.
- Leather Straps: They add a fancy touch and are comfy to carry.
- Wooden Bar Handles: For a classic look and strong grip.
- Rope Handles: They give a unique, rustic feel to the tray.
Step-by-Step Handle Installation
Putting handles on your tray is simple if you follow these steps.
- Pick a handle style that fits your tray’s design.
- Measure where you want the handles on the tray.
- Mark where you’ll need to drill for the handles.
- Drill holes or cutouts needed for your handles.
- Secure the handles with screws, glue, or other methods.
- Check the handles by lifting the tray to make sure they’re tight.
Choosing the right handles and installing them correctly will make your wooden breakfast tray both pretty and functional. Whether it’s a basic cutout or an elegant leather strap, good handles change how the tray works and looks.
Customizing Your Tray’s Appearance
Personalizing your wooden breakfast tray adds charm and uniqueness. It’s important to have a tray that works well. But, a decorated tray brings something special to your breakfast. Try adding art that shows your style and makes the tray beautiful.
Adding Decorative Elements
You can make your tray unique in many ways. Consider using paint techniques like sponging or watercolors. These can create eye-catching backgrounds. Adding elements like flowers or stones can bring a natural beauty to your tray.
Using Stencils and Decals
Decorating with stencils is a popular choice. They can be simple shapes or detailed designs. Stencils make painting easy and give a neat finish. Then, add vinyl decals for a personal touch. These decals can have quotes or images, making your tray stand out.

| Decoration Method | Effect | Ease of Application |
|---|---|---|
| Paint Techniques | Vibrant backgrounds or patterns | Moderate |
| Stencils for Wood Design | Precise and professional patterns | Easy |
| Vinyl Decals | Personalized messages or images | Very Easy |
Your tray can be more than just useful. It can show off your creativity. By adding these elements, your tray reflects your personal touch.
Maintenance and Care for Your Tray
To keep your wooden breakfast tray in top shape, it’s important to know how to take care of it. The right care will make your tray last longer. Let’s talk about how to clean and care for your wooden tray.
Cleaning Tips to Keep It Looking New
Cleaning your wooden serving tray regularly is key. Here are some easy tips:
- Use a soft cloth dampened with warm water to wipe the surface after each use.
- For stubborn stains, a mixture of mild soap and water can help; ensure to rinse it off with clean water.
- Avoid soaking the tray in water, as excessive moisture can warp the wood.
- Consider using food-safe mineral oil to condition the wood periodically, enhancing its natural sheen.
Long-Term Care and Storage Solutions
There’s more to caring for your tray than just cleaning. To protect your tray:
- Store it in a cool, dry place to avoid extreme temperatures and humidity.
- Keep it away from direct sunlight to prevent discoloration and cracking.
- Wrap it in a soft cloth when not in use, especially if storing for a long time.
- Regularly check for any signs of wear or damage, and fix these issues quickly.
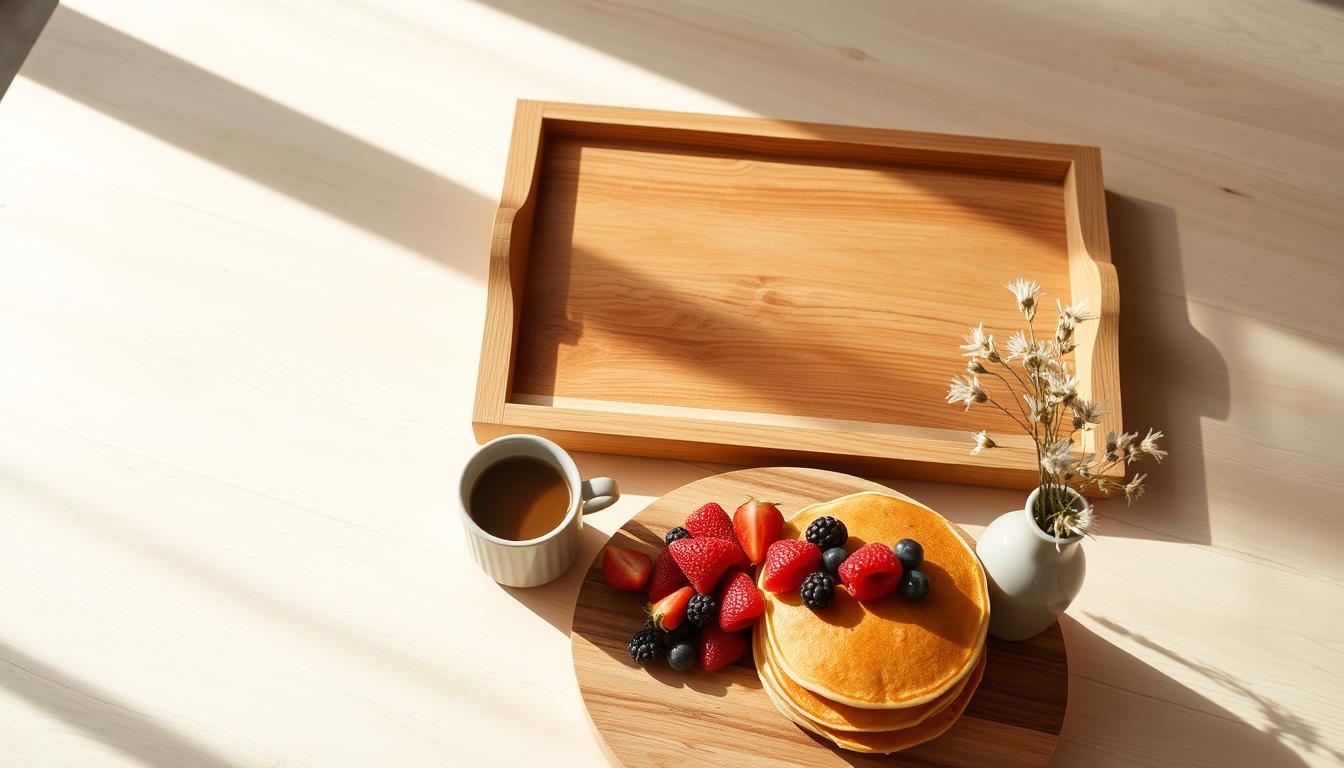
Creative Uses for Your Wooden Breakfast Tray
Wooden breakfast trays aren’t just for breakfast in bed. They have many uses that bring beauty and usefulness to your space. By exploring different ways to use them, you unleash creativity. Here are some fun and useful ideas to make your home better.
Serving Breakfast in Bed
A classic use for wooden breakfast trays is serving breakfast in bed. Picture waking up to a tray with fresh fruit, pastries, and hot coffee. A wooden tray transforms a simple meal into something special. It’s elegant and keeps things neat, offering a lovely start to anyone’s day.
Seasonal Decor Ideas
Your wooden breakfast tray can become a seasonal centerpiece. In fall, fill it with mini pumpkins and pinecones for a cozy look. For winter, add candles and evergreen branches to make it festive. These ideas let your tray stand out, not just at breakfast, but all year round.
Using a wooden breakfast tray in different ways shows it’s versatile. With creativity, it becomes a standout piece for daily living and holidays. Dive into the creative uses and see how this item can improve both the look and function of your home.
Sharing the Experience: Gifting Your Tray
Gifting wooden trays is special because of the thought and effort behind it. A handcrafted breakfast tray is great for many events. It suits weddings, housewarmings, or holidays like Thanksgiving and Christmas. Making the gift fit the person you’re giving it to makes it extra special. It shows you care and pay attention to what they like.
Gift Ideas for Different Occasions
Customizing your wooden tray can make the gift perfect for any celebration. For newlyweds, engrave their names or wedding date on the tray. It becomes a keepsake they’ll always treasure. At housewarmings, adding gourmet coffees or teas can be a thoughtful touch. And for the holidays, decorating the tray with pine cones or festive ornaments makes it a stunning centerpiece.
How to Present Your Gift Thoughtfully
Presenting your gift in a personal way makes it even more meaningful. Wrap the tray with natural jute twine or a fabric ribbon for a cozy feel. Including a handwritten note adds a personal touch. The way you present the gift should reflect the thought and care that went into making it. This makes giving a wooden tray not just a simple gift, but a memorable experience.