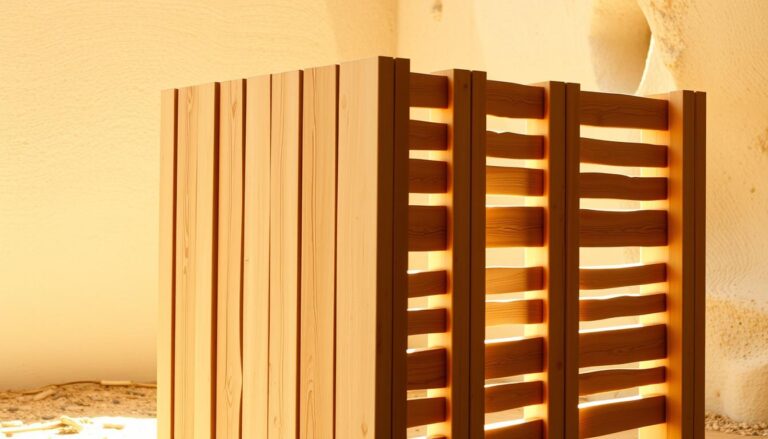
About 80% of homeowners are getting into DIY projects to make their homes better. This shows a big interest in being creative and making your home unique. If you like DIY projects, making a porta-toalhas de madeira e sisal is a great choice. This guide will show you how to make a cool towel holder. It’s good for any skill level and combines looks with usefulness.
Introduction to Wooden and Sisal Towel Racks
A towel rack is key in any bathroom. It does more than just hold towels; it makes the room look better. By learning about towel racks, you see they keep towels tidy and help them dry. This is especially true with wooden and sisal racks. They mix use with nature-inspired style.
What is a Towel Rack?
A towel rack is handy for keeping towels in place. It helps your bathroom stay neat. There are many types and designs. Wooden racks are loved for their classic beauty and function.
Benefits of Using Wood and Sisal
Wooden racks last long, even in damp places. They bring a cozy look to any bathroom. Sisal racks are strong and resist wear well. They work great with wood. Together, they highlight nature’s beauty and offer a sturdy spot for towels.
Materials Needed for Your Project
To make a wooden and sisal towel rack, you need the right materials for long-lasting use and good looks. It’s important to know the types of wood for towel hangers for a strong build. Choosing the right sisal rope selection is key for both function and style. Make sure you have all the tools you need for a smooth project.
Types of Wood Suitable for Towel Racks
Choosing good wood is key for your towel rack to last. Let’s look at some good choices:
| Type of Wood | Durability | Appearance |
|---|---|---|
| Pine | Moderately durable | Light and versatile |
| Oak | Highly durable | Rich grain |
| Cedar | Resistant to moisture | Warm tone |
Choosing the Right Sisal
Picking the best sisal rope is crucial for a stable, stylish towel rack. Keep in mind:
- Thickness: The rope should be thick for more strength.
- Texture: Find a texture that looks good with your wood.
- Length: Double-check the length to fit your design.
Tools You Will Need
Being prepared is essential. You will need:
- Saw for clean wood cuts
- Drill for fasteners
- Screwdriver for putting things together
- Tape measure for right dimensions
Designing Your Towel Rack
Starting to design your towel rack is a key step. It’s where creativity and practicality join hands. A well-planned DIY towel rack sketch won’t just make your bathroom look better. It will also fit perfectly in your space.
Creating a Simple Sketch
Making a simple sketch helps you see your design. Think about your style and your bathroom’s theme first. Consider the types of wood and sisal you want to use and how they’ll look together. Your sketch should show these elements, guiding you as you move forward with your project.
Size Considerations for Your Space
Knowing your towel rack dimensions is crucial for a design that works. First, measure where you’ll hang the rack, making sure it’s easy to reach and fits well. Consider how many towels you’ll store and their size. This knowledge in designing a towel rack lets you create a piece that not only looks good in your home but is also practical.
Cutting and Preparing the Wood
Getting your wood ready and cutting it right are key for a solid towel rack. Before you start cutting, it’s important to know how to measure everything correctly. This makes sure all parts will fit together well and look good.
Measuring Your Wood Pieces
First, measure all the wood pieces you need for the rack. Make sure to use a tape measure that’s accurate. Here are some tips for getting it right:
- Measure twice, cut once: Double-check your numbers to avoid mistakes.
- Account for material thickness: The wood’s thickness matters for your design.
- Mark clearly: Draw your cut lines with a pencil so they’re easy to see.
A square tool can help keep your lines and cuts straight. Also, make sure your workspace doesn’t move around while you’re cutting.
Safety Tips for Cutting Wood
Using power tools safely is very important. Here are some tips to help you stay safe while working:
- Wear protective gear: Don’t forget safety goggles and gloves.
- Secure your wood: Clamp it down to keep it from moving.
- Keep your workspace tidy: Clean up anything you could trip over.
Safety is crucial, no matter your skill level. By following these steps, you make woodworking safer and more fun.

Attaching the Sisal to the Wood
Making a towel rack with wood and sisal? It’s all about how you attach the sisal rope. Securing sisal onto wood makes it last longer and looks great, too. Discover top ways and cool sisal designs to make your towel rack stand out.
Best Techniques for Securing Sisal
Ready to fix sisal rope to your towel rack? Try these ideas:
- Knots: Learning a couple of knots helps a lot. A double knot stays strong, and a square knot looks neat.
- Adhesive: A good glue keeps sisal in place. Choose one made for natural fibers for the best stick.
- Stapling: Stapling the sisal rope quickly secures it for a long time.
Creative Ways to Use Sisal with Wood
With sisal rope, you can get really creative. Check out these cool ideas for your towel rack:
- Wrap Techniques: Wrapping sisal around parts of the rack gives a natural and rough look that matches the wood beautifully.
- Layering: Stacking sisal in different ways adds more interest. Play with thick and thin sisal layers for a unique look.
- Functional Art: Turn your towel rack into an eye-catching piece by decorating it with sisal.
Assembling the Towel Rack
Putting together your towel rack is a rewarding part of the project. It’s where all your effort pays off. You’ll follow easy steps to get a solid, good-looking rack for your bathroom. We’ll show you how to do it, step by step.
Step-by-Step Assembly Instructions
- Begin with a flat, clean workspace for assembling your towel rack.
- Lay out each piece of wood and sisal according to your design plan.
- Use wood glue to bond the joints before securing them with screws, ensuring each part fits snugly.
- Attach the sisal to the designated wooden sections. Start at one end, wrapping it tightly and securing it with a staple gun for a secure hold.
- Double-check all connections for tightness before moving to the next step.
- Finish by adding any additional decorative elements or supports, if planned in your design.
Tips for a Sturdy Construction
For a rack that lasts, keep these tips in mind:
- Choose high-quality screws and brackets for added support.
- Use a level to ensure your towel rack will hang evenly once installed.
- Reinforce corners with extra brackets or dowels to withstand daily use.
- Test the stability of your towel rack by applying light pressure to ensure all connections are secure.

Finishing Touches Before Installation
To make your towel rack look and last like a pro’s work, finishing it right is key. You’ll need to smooth the wood with sanding. Then, pick a wood finish that boosts its look and toughness.
Sanding and Smoothing the Wood
Begin by sanding the wood to get rid of rough spots. You should use fine-grit sandpaper, about 220 grit. This leaves the surface smooth. Sanding makes the towel rack look better and ready for finishing. Take your time to make sure the wood’s surface is smooth and even.
Choosing the Right Finish for Your Project
Choosing a great finish is crucial for your towel rack’s final appearance. You can pick from varnish, polyurethane, or stain. They offer different looks and protection. Make sure your finish matches your home and protects the rack from water and damage. Put on the finish in light coats, allowing drying between them for the best outcome.
Installing the Towel Rack
Installing a towel rack the right way can change your space. It makes sure towels are easy to get to. Picking where to put it is important for looks and use. This part will give you ideas on the best spots for your towel rack in the bathroom or kitchen.
Best Locations for Placement
When thinking about where to put your towel rack, look at areas used a lot like sinks and baths. Consider how easy it is to reach towels and how it makes the room look. Some of the best places include:
- Next to the shower or bathtub for quick access after bathing.
- Close to the sink or vanity for hand towels.
- On the back of a bathroom door to save floor space.
Tools for Installation
Having the right tools makes installing a towel rack easier. Here’s what you’ll need:
- Drill
- Screws
- Wall anchors
- Level
- Tape measure
- Pencil or marker for marking
Caring for Your Wooden and Sisal Towel Rack
Taking care of your towel rack is important to keep it looking good and working well. With proper cleaning and fixing any small damage, your wooden and sisal towel rack will stay like new for a long time. Here are some tips on how to clean wooden racks and fix damage to sisal.
Cleaning Tips to Maintain Its Beauty
Regular cleaning is important to maintain your towel rack’s appearance. For wooden racks, lightly wipe them with a soft cloth and mild soap. Avoid using strong chemicals as they can harm the finish and color. Focus on areas that get moist or dusty.
After cleaning, dry the wood right away to avoid moisture damage. This helps prevent the wood from warping or getting damaged.
How to Repair Minor Damage
Fixing sisal damage is easy. If it starts to fray, carefully cut the loose ends to stop more unraveling. For wooden parts, minor scratches can be hidden with wood polish or the right color wood filler. Use a small amount of filler with a tool to smooth over scratches, making your rack look better.
| Type of Damage | Repair Method | Tips |
|---|---|---|
| Frayed Sisal | Trim loose fibers | Use sharp scissors for a clean cut |
| Scratches on Wood | Apply wood filler | Match the filler to the wood color |
| Water Stains | Use a mixture of vinegar and olive oil | Rub gently until the stain lifts |
Using these care tips, you’ll have a towel rack that not only looks great but is easy to take care of.
Decorating Around Your Towel Rack
A towel rack can be the highlight of your bathroom with the right style. You can make your space warm and unified with cool decorating tips. Begin by placing stylish accessories near your towel holder. This brings a personal touch and gives your area some character.
Incorporating Accessories for Design
Decorative items can make your towel holders look great. Think about adding:
- Colorful Towels: Pick bright or patterned towels that match your bathroom’s style.
- Plants: Small potted plants or succulents can add a fresh feel.
- Artwork: Place some art or framed pictures near your towel rack for a unique touch.
Coordinating Colors and Textures
To match colors well, choose shades that go with your towels and room’s look. Try to mix textures for a good design. Use both smooth and rough materials to catch the eye. Here are some ideas:
| Color Palette | Texture Type | Suggested Accessories |
|---|---|---|
| Pastels | Smooth | Soft towels, ceramic accessories |
| Bold Colors | Rough | Natural wood decor, woven baskets |
| Neutrals | Mixed | Metal pieces, textured linens |
Conclusion and Additional Resources
You’ve learned how to make a wooden and sisal towel rack. Now, think about the steps involved. Choose the right wood, attach the sisal well, and put everything together so it’s strong. Understanding these steps makes creating your own rack both fun and rewarding.
If you want to try more DIY projects, there’s a lot you can explore. From making your home look better to adding useful items, there’s so much to do. Doing these projects makes your space nicer and shows off your unique style and skills.
Enjoy the feeling of making your very own towel rack. Let it motivate you to tackle more creative projects at home. Each DIY project is a chance to make your home better and improve your abilities. Happy crafting!