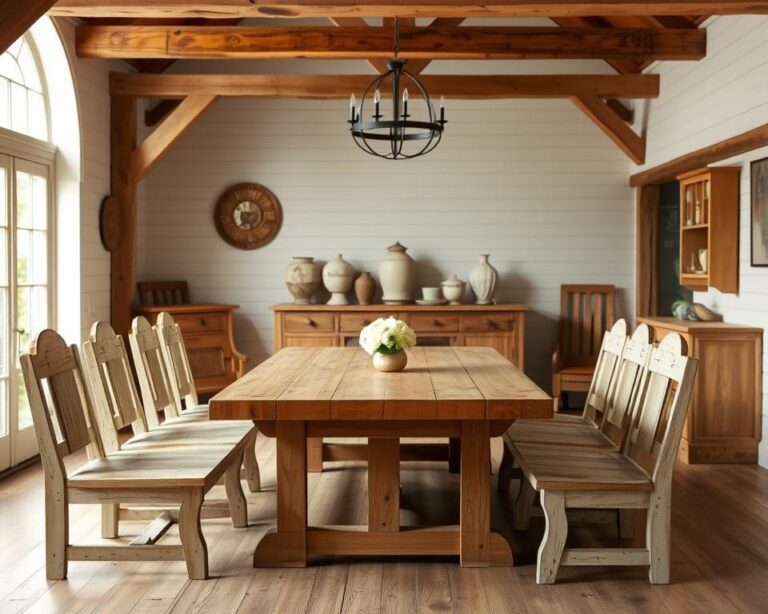
Did you know each person in the US uses about 7 towels? Keeping this in mind, finding smart ways to store them is key! A stylish wooden towel holder with sturdy sisal rope can change your space. It makes it neat while adding a rustic vibe.
Our guide will help you make this towel holder, whether you’re new to DIY or a pro. This project is not just a fun way to improve your home. It’s also a green choice that helps reduce mess and shows off your towels beautifully. Let’s dive into creating your own wooden and sisal towel holder!
Introduction to Wooden and Sisal Towel Holders
Wooden and sisal towel holders are not just useful. They also add style to your home. They make your space look better while being very practical. Using natural materials like these keeps your home organized. It also shows the value of using sustainable resources in your decor.
Benefits of Using Wood and Sisal
Wood has a lot of benefits. It’s strong and can hold up to daily use. It also brings a cozy feeling to a room. Sisal’s natural texture adds beauty and is good at resisting water. It feels comfortable to touch. Both materials bring style and usefulness together. This makes wooden and sisal towel holders a great addition to your home.
Aesthetic Appeal and Functionality
Wooden and sisal towel holders are both practical and decorative. They match well with many decorating styles, from old-fashioned to modern. This makes them perfect for any bathroom or kitchen. By choosing these materials, you get items that are useful and make your home look better.
Materials Needed for Your Project
To make a wooden and sisal towel holder, you need the right materials for towel holder construction. Picking the correct items ensures your holder is both useful and durable. Here’s what you need for a successful DIY project.
Selecting the Right Type of Wood
Choosing good wood is key for looks and strength. Here are some good types of wood for towel holders:
- Pine: It’s light and easy to use, great for starters.
- Oak: Strong and has a nice grain, giving durability and a timeless style.
- Cedar: Resists moisture well, perfect for damp places.
Choosing the Best Sisal Rope
Picking the right sisal rope selection affects how your towel holder looks. Sisal rope is popular for its strength and natural feel. Here’s what to consider in your choice:
- Diameter: Thicker rope holds better and looks more noticeable.
- Twist: Multi-stranded rope lasts longer and adds texture.
- Color: Go for natural or dyed to complement your wood.
Other Essential Supplies
You also need other essential DIY supplies for this project:
| Supply | Purpose |
|---|---|
| Wood Glue | To keep joints tight and add stability. |
| Screws | For joining wood pieces firmly. |
| Sandpaper | Smooths surfaces and edges before putting it together. |
| Drill | Makes holes for screws and sisal rope. |
| Measuring Tape | Ensures accurate size and placement. |
Step-by-Step Instructions
Building a wooden and sisal towel holder requires careful planning. By following our DIY guide, you’ll make each part of the towel holder correctly. Start with preparing the wood, then cut and shape the pieces, and end by attaching the sisal rope firmly. Each step is important for the towel holder’s function and look.
Preparing the Wood Pieces
First, pick high-quality wood that looks how you want. Measure carefully to make sure all parts fit together well when you build it. Here are the standard sizes for the towel holder:
| Piece | Dimensions (inches) |
|---|---|
| Top Bar | 24 |
| Side Pieces | 30 |
| Bottom Shelf | 20 |
Cutting and Shaping the Wood
With your wood ready, start cutting it into the right sizes. You can use a miter saw or a circular saw. Make sure your cuts are straight. After cutting, shape the wood to smooth any rough parts. Sand the surfaces from rough to fine grit sandpaper for a smooth, ready-to-assemble surface.
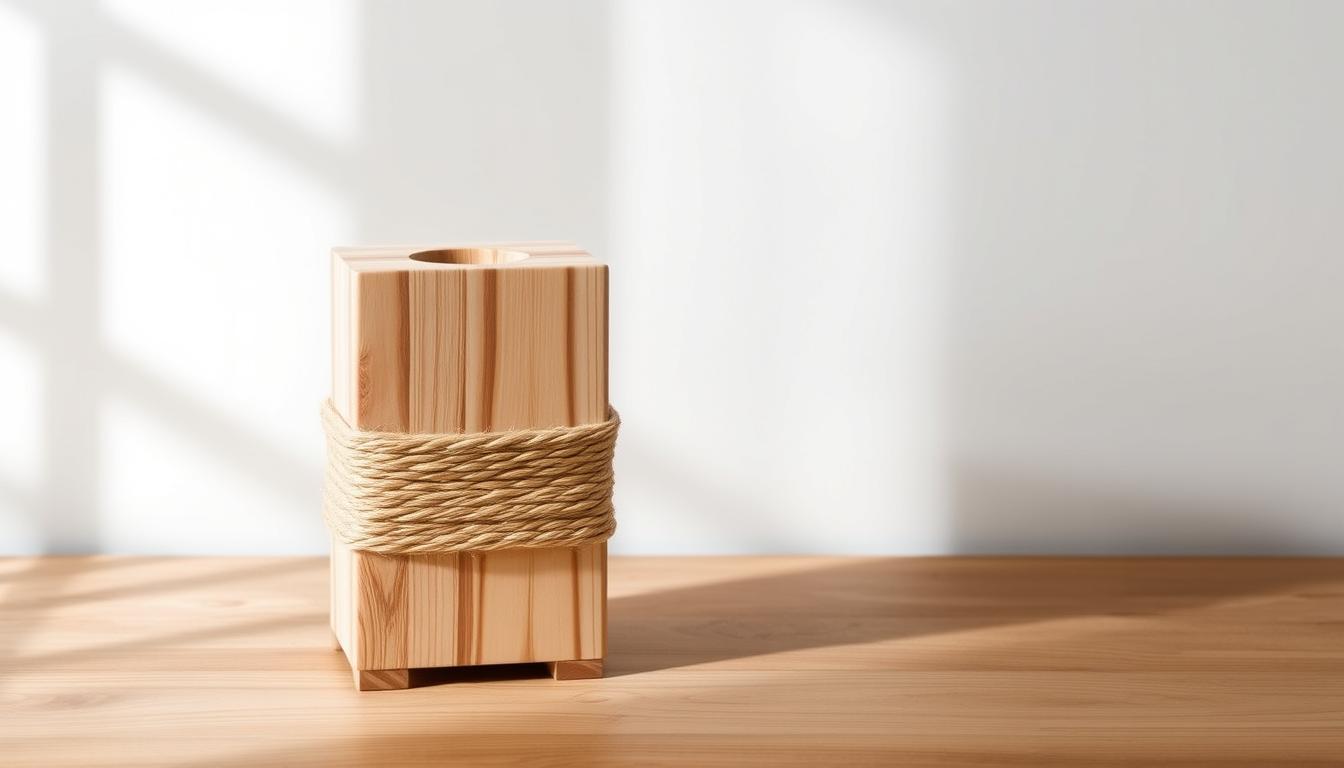
Attaching the Sisal Rope
Adding sisal rope is the last step. It adds both strength and style. Cut the sisal rope to needed lengths, allowing space between ropes for towels. Attach the sisal rope to the top bar with strong glue and double knots for extra hold. Make sure the rope is tight to keep your towel holder functional and stylish.
Creating a Design for Your Towel Holder
Designing your towel holder is a fun way to show off your style while being useful. You can choose from simple or detailed designs to match your home’s vibe. Whether you like things plain or fancy, there’s a design for you. Looking at different ideas can inspire you and kick-start your creativity.
Simple vs. Complex Designs
Simple designs focus on doing the job well and are easy to make. For example, a basic wooden frame with a rope can be a great towel holder. It won’t take over your room. Complex designs, though, bring art into the mix with special shapes and extra details. These designs can turn a towel holder into a statement piece.
Inspiration Sources for Design Ideas
If you’re looking for ideas, there are lots of places to find them. Sites like Pinterest show tons of photos to help you decide what you like. Also, home improvement blogs talk about the latest trends and tips. They make crafting your unique piece simpler. Mixing ideas from these sources lets you create a towel holder that fits perfectly in your home.

Assembly of the Towel Holder
Building a towel holder can be really rewarding, particularly when your design comes to life. It’s all about carefully putting wooden pieces together and securing materials like sisal. Using these DIY tips will help make your project strong and look good.
Joining the Wooden Pieces
Start by lining up the wooden pieces you’ve cut. Use wood glue and screws for a firm hold. It’s smart to drill holes first to avoid splitting the wood and to get a neat finish. Pick screws that match the wood’s thickness. Keeping the pieces aligned well makes the towel holder stable and nice-looking.
Securing the Sisal Effectively
After assembling the wood frame, it’s time to attach the sisal rope. Wind the rope tightly around the wood, using hot glue or a strong fabric adhesive. Loop it several times for extra strength. This not only looks great but also makes sure it can handle being used daily.
Finishing Touches
When you finish your wooden and sisal towel holder, a few key steps make a big difference. Making the wood look nicer and last longer is what it’s all about. You need to sand it well and put on a protective coat.
Sanding for Smoothness
Sanding makes the surface smooth and enhances your towel holder’s quality. Start with rough sandpaper to smooth out bumpy areas. Then, use finer sandpaper for a soft finish.
Here are some tips for sanding:
- Use different sandpapers, from 80 grit to 220 grit, for ultimate smoothness.
- Always sand in the direction of the wood grain to avoid scratches.
- Check for smoothness after each sanding step for a flawless finish.
Applying a Protective Finish
After smoothing the surface, it’s time for a protective coat. These finishes shield the wood from water and stains. They also bring out the wood’s beauty. When picking a stain for wood, think about these choices:
- Wood stain adds color and shows off the wood’s grain while keeping its look natural.
- Clear sealants keep the wood’s original color and protect it from damage.
Pick a finish that matches your vision and needs for durability. Correctly applying these finishes ensures your towel holder stays beautiful and useful for a long time.

Mounting Your Towel Holder
Mounting your towel holder right is key. It ensures it works well and looks good. The perfect spot makes it easy to use and keeps your room looking neat. Follow some installation tips for a tight fit and easy access. Knowing what tools you need helps make installation smooth.
Choosing the Right Location
Start by looking at your bathroom or kitchen. Find wall spots that are easy to reach but out of the way. It’s smart to put the towel holder near sinks or showers. This makes it handy. Be sure it doesn’t block other fixtures. You want everything to be tidy and work well together.
Tools Required for Installation
Using the right tools makes installing easier. Here are some important tools you’ll need:
- Level – to ensure your towel holder is straight
- Drill – for creating holes in the wall
- Wall anchors – important for securing the holder, especially on drywall
- Screwdriver – for attaching the holder to the wall
Care and Maintenance Tips
Keeping your wooden and sisal towel holder in great condition requires regular care. Follow these tips to ensure it lasts long and stays beautiful. By doing so, you’ll maintain its quality and appeal.
Cleaning Wooden and Sisal Materials
Use a soft, damp cloth for cleaning wood to avoid damage. Stay away from strong chemicals that harm finishes. A gentle soap and water mix is best for cleaning.
For sisal, gently vacuum to remove dust. Use a damp cloth for spot cleaning without damaging the fibers.
Tips for Longevity
To make your towel holder last longer, apply a protective coat to the wood every few years. This enhances its look and guards against moisture. Avoid high humidity to keep sisal from molding. Always trim frayed fibers to keep the sisal neat.
Variations on the Wooden and Sisal Towel Holder
There are many ways to create your wooden and sisal towel holder. You can make them simple or fancy. They come in different sizes and shapes to fit your style and space.
Different sizes and shapes of towel holders change the look of your bathroom. A big one works well in a family bathroom. A small one looks great in a guest bath. You can pick round or square shapes to match your decor. Trying out new shapes that show off your style is fun.
Different Sizes and Shapes
- Standard sizes for family use
- Compact designs for small spaces
- Curved shapes for a softer look
- Angular styles for a modern touch
You can get creative with custom towel holders. Picking finishes, colors, or decorations makes them special. Match your towel holder to your bathroom for a unified look.
Customization Ideas
- Paint or stain to match your color scheme
- Incorporating hooks or additional shelving
- Adding personalized engravings or designs
- Using contrasting materials for a unique look
Your towel holder can be both useful and stylish. With some planning, it’ll meet your needs and fit your decor perfectly.
Cost Considerations
Understanding your DIY towel holder’s financial side is key. Planning involves both material costs and the time needed. This way, you can make a quality towel holder without spending too much.
Budgeting for Materials
Knowing what materials will cost is important for any DIY project. You need to consider things like the wood and sisal rope. Their prices can change a lot depending on where you buy them. Setting a budget helps control your DIY project costs. For example, local stores usually offer good deals, but special shops might be more expensive.
Time Investment in the Project
Time is a big part of planning your project. You need enough time for preparing, putting it together, and adding final touches. Thinking about budgeting DIY projects means thinking about how long each part takes. Knowing this keeps you from rushing or feeling stressed while making your towel holder.
Conclusion and Encouragement to Try
We’ve just explored how to make a wooden and sisal towel holder. We covered what materials you need, like the right wood and sisal. We also talked about preparing and putting everything together. By following these steps, you can create a unique piece that’s both useful and stylish.
Doing DIY projects like this towel holder is very rewarding. It doesn’t matter if you’re new to crafting or have lots of experience. This project invites you to bring your creative ideas to life. And seeing your completed work is always a great feeling.
To wrap things up, consider this a push to try out your handiwork skills. Remember, each project teaches you something new. Feel free to make the towel holder your own or tweak how it’s made. Enjoy your crafting time, and here’s to hoping you find joy in the results!