Did you know that over 67% of American households have a pet? That means creating a cozy spot for them is very important. A simple wooden pet bed provides a comfy spot for your pet and looks good in your home. This guide will show you how to make a wooden pet bed. It’s practical and easy on the wallet for pet owners who like DIY projects. No matter if your furry friend is big or small, our directions will help you make the perfect simple wooden pet bed they will love.
Why Choose a Simple Wooden Pet Bed?
Many pet owners choose wooden beds for their pets. Wooden beds last long and are strong. They keep pets comfortable in any weather, thanks to *natural insulation properties*.
Benefits of Wooden Pet Beds
Wooden pet beds come with many perks. They are easy to clean and don’t hold onto allergens like fabric beds do. Plus, they look great in any house, adding a cozy spot for pets.
Ideal for Various Pet Sizes
These beds are great for all pet sizes. Whether it’s a tiny puppy or a big dog, there’s a bed that’s just the right size. Pet owners can pick a bed that’s perfect for their pet’s size and sleep style.
Customization Options
Wooden pet beds can be made unique with different styles, colors, and finishes. This means pet owners can make a bed that fits their home and shows their style. Every bed can be special for the pet and look good in the home.
Materials Needed for Your Wooden Pet Bed
To make a cozy wooden pet bed, pick the right stuff, like materials, tools, and extras. Knowing what you need helps make a pet bed that looks good and keeps your pet safe and comfy. Here’s a quick guide on what you’ll need to build your pet bed.
Types of Wood to Consider
Picking the best wood is key for your pet bed.
- Pine: It’s affordable and easy to use, making it a common pick.
- Cedar: It’s tough against pests and rot, smells nice, and lasts long.
- Poplar: A strong hardwood, poplar is a solid choice for durability.
- Birch: With its nice look and strength, birch is great for many projects.
Tools You’ll Need
You’ll need some specific tools to make a pet bed. Here’s what should be in your toolkit:
- Measuring tape: For getting all your measurements just right.
- Saw: A saw, like a circular or miter one, makes cutting wood easy.
- Drill: It’s for making holes and putting pieces together.
- Sander: It helps smooth edges, so there are no splinters.
- Clamps: They hold pieces in place while you work, for better results.
Optional Accessories for Comfort
Add some extras to make the pet bed even cozier.
- Cushions: A soft cushion makes a perfect sleeping spot for your pet.
- Extra padding: A soft pad adds more comfort inside or under the bed.
- Removable covers: They make cleanup easier and let you switch up the look.
Paying attention to these details helps you build a comfy spot for your pet. By choosing the right materials, wood, and tools, you’ll make a great pet bed.
Measuring Your Pet for the Perfect Fit
To find the right bed size for your pet, you must understand their sleep habits. Pets have different ways of sleeping that affect bed size. A bed that fits well makes sure your pet sleeps comfortably and feels safe.
Understanding Your Pet’s Sleeping Habits
Each pet sleeps in its own way. Some curl up, others stretch out. Watching how your pet sleeps helps you choose the right bed size. For pets that stretch, you’ll need a bigger bed.
Measuring Length and Width
Start by having your pet in their favorite sleep position. Measure from their nose to tail base, adding inches for ease. Measure their width in a relaxed stance. This ensures the bed fits well and is comfy.
Accounting for Extra Space
Don’t forget to add extra space. Your pet needs room to move and turn easily. Add 4-8 inches to length and width for best comfort. This extra space lets your pet switch positions and not feel tight, making sleep better.
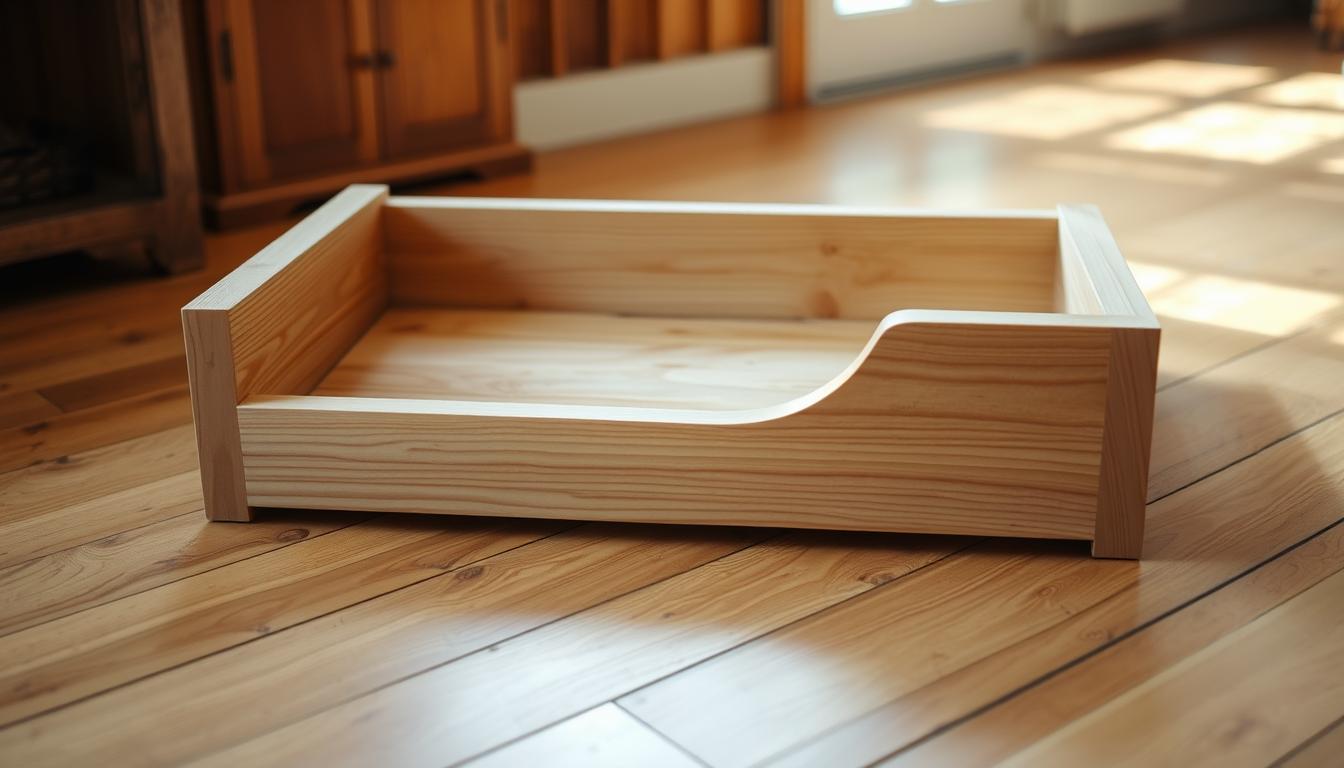
Step-by-Step Guide to Building the Bed Frame
Making a strong bed frame is crucial for a comfy pet bed. It’s pretty easy if you follow a step-by-step method. Let’s dive into how to cut wood, assemble the frame, and add the final touches to your pet bed.
Cutting the Wood to Size
First, measure the size you want carefully. Then, use a saw to cut the wood pieces based on these sizes. Having a good plan helps a lot in making a pet bed frame. Cutting accurately is important because it affects the bed’s stability and strength.
Assembling the Frame
After cutting the wood, it’s assembly time. Begin by connecting the side and end panels with wood screws or brackets. Make sure every join is tight before going to the next part. A well-put-together frame means your pet’s bed can handle everyday use.
Sanding and Finishing Touches
Sanding the edges makes them smooth and safe from splinters. This step is key for safety and looks. Then, paint or seal the wood to finish up. This boosts the wood’s look and protects it from moisture and wear.

| Step | Description |
|---|---|
| 1 | Measure and cut the wood to the desired size. |
| 2 | Assemble the side and end panels securely. |
| 3 | Sand all surfaces to prevent splinters. |
| 4 | Apply paint or sealant for finishing touches. |
Creating the Bed Base for Comfort
To make sure your pet sleeps well, focus on the bed’s comfort. A good bed base is key for comfort. Choose the right materials and add layers for softness.
Choosing the Right Bedding Material
Pick bedding that’s both durable and soft for your pet. Common choices include:
- Memory Foam: Conforms to your pet’s body, providing support.
- Microfiber: Soft and easy to clean.
- Cotton: Cool and natural, great for pets that get hot.
Choose materials that you can wash in a machine to keep things clean.
How to Make a Cozy Cushion
To make a cushion, first measure your bed frame. Here’s how to create a comfy one:
- Cut foam or batting to fit your pet’s bed base.
- Wrap the foam in fabric, leaving fabric on the sides for closing.
- Use sewing or fabric glue to close the edges tightly.
This custom cushion fits well and adds style to your pet’s bed.
Tips for Adding Softness
For more comfort, try these tips:
- Put a fluffy blanket on the cushion for warmth.
- Use soft pillows to make a cozy spot.
- Add a washable cover for easy cleaning.
By doing these things, you’ll make a comfy spot that helps your pet sleep well. A well-made bed makes pets happy and healthy.
Painting or Staining Your Pet Bed
Adding the final touches to your wooden pet bed is key for looks and safety. When you paint it, you make it look better and protect it too. Staining it can show off the wood’s beauty and make it last longer. Making your pet’s space feel welcoming and warm is important.
Popular Colors and Staining Techniques
Think about colors that go well with your home when picking for your pet bed. Some top choices are:
- Soft pastels for a peaceful vibe
- Bold colors to stand out
- Natural wood shades for a country feel
Staining can highlight the wood’s texture. You can use a brush or cloth to affect the stain’s depth. But, make sure to spread the stain evenly to look its best.
Non-Toxic Options for Safety
Keeping your pet safe is always crucial. Choose non-toxic finishes for your pet bed to avoid bad chemicals. Many brands make safe paints and stains for pets. Always check that the product is pet-friendly.
Final Finishing Steps
After painting or staining, it’s important to finish it off right. Let each coat dry well to avoid stickiness. A light sanding after the first coat makes it smoother and helps the next one stick better. Make sure it dries in a place with good air flow before your pet uses it.
Adding Unique Features to Your Pet Bed
Making your pet bed better is not only about function. It’s about making a cozy, practical spot for your pet. By adding special features to pet beds, you change a simple bed into something great. Let’s talk about some creative ways to upgrade your pet’s bed.
Built-in Storage for Toys
A pet bed with storage helps handle the mess from toys and gear. You can add drawers or spaces right under the bed. This setup keeps toys in order and easy for pets to get to.
Think about using strong stuff like wood. It looks good and lasts long.
Space for Personalization
Make the pet bed unique by adding a personal touch. You could engrave their name, use fun pillows, or a cool fabric pattern that goes with your decor.
Doing this makes a special spot your pet will adore and shows off your taste.
Weatherproofing for Outdoor Use
If your pet likes being outside, make the bed weatherproof. Pick materials that stand up to the weather or add outdoor covers. This way, your pet can enjoy the outdoors in any weather safely.
With these smart changes, your outside area will be a perfect hangout for your pet.
Setting Up the Pet Bed in Your Home
Choosing where to place your pet bed really impacts your pet’s well-being and how your home looks. It’s important to pick a spot that feels safe and easy for your pet to get to. Think about places in your house that are both comfy and practical for them.
Best Locations for the Bed
Think about spots that fit well with your pet’s nature and your home life. Here are some good places:
- Near family activity areas promotes socialization.
- In a quiet corner gives pets a peaceful retreat.
- Avoid high-traffic zones to minimize disruptions.
Introducing Your Pet to Their New Space
Getting pets used to a new bed spot takes gentle encouragement. Try adding toys or blankets they love to the bed. Use treats and kind words to lead them there. Spending time near the new bed helps them feel safe and cozy.
Keeping the Area Clean
Keeping the pet bed area clean is key for your pet’s health and your home. Be sure to vacuum and clean surfaces regularly. Good cleaning habits keep smells away and make the space inviting. Washing the bed often is also important for a fresh, clean rest area for your pet.

Maintenance Tips for Longevity
To keep your wooden pet bed in top shape for your animal buddy, it’s key to look after it well. By taking good care of it, you make sure it lasts longer. Your pet will get to enjoy their cozy spot for years. Here are some tips for taking care of your wooden pet bed.
Cleaning and Care Instructions
Begin with a weekly cleaning routine for your pet furniture. Use a soft cloth to dust off surfaces. Then, pick a mild cleaner that’s safe for pets to tackle tough spots. Stay away from strong chemicals that could hurt your pet. Spills should be cleaned immediately, and the wood must be dried fully to prevent damage.
Repairing Wear and Tear
After a while, your pet bed might show signs of wear. Make it a habit to look for scratches or weak joints. To fix small issues, you can smooth out rough patches, tighten screws, or glue loose parts. This way, your pet’s bed stays safe and welcoming.
When to Replace the Bed
Knowing when it’s time for a new bed is important. Look out for big scratches, cracks, or if the bed wobbles. Also, if your pet doesn’t want to use it anymore, it might be time for an upgrade. Regular checks will keep your pet’s sleeping spot safe and cozy.