Did you know Scandinavian design is more popular now, with more people searching for it by over 40% recently? It’s loved for its simple, minimal, and functional style. In this guide, we’ll show you how to make a Scandinavian wooden side table. It’s a stylish piece for any modern home.
The Scandinavian design side table is all about practicality and adding natural beauty to your space. Making a DIY wooden side table is rewarding. It looks great and matches the understated elegance of Scandinavian style. Get ready for a DIY adventure that combines beauty with use. Your home will feel warm and welcoming.
Introduction to Scandinavian Design
Scandinavian design mixes form and function, originating from Nordic countries like Norway, Sweden, and Denmark. It’s all about simplicity and minimalism, connecting with nature. Clean lines, natural materials, and soft colors are key.
What is Scandinavian Design?
Scandinavian design aims to make beautiful, functional spaces. It believes beauty should be easy to get, often using local materials. For example, natural wood is big in designs like modern Scandinavian wood side tables for its strength and craft.
Key Features of Scandinavian Furniture
Scandinavian furniture stands out for several reasons. These include:
- Natural Materials: It uses wood, leather, and textiles for a cozy feel.
- Light Colors: The colors, like whites and grays, make spaces seem bigger.
- Functional Design: The furniture is smart, sleek, and versatile for today’s life.
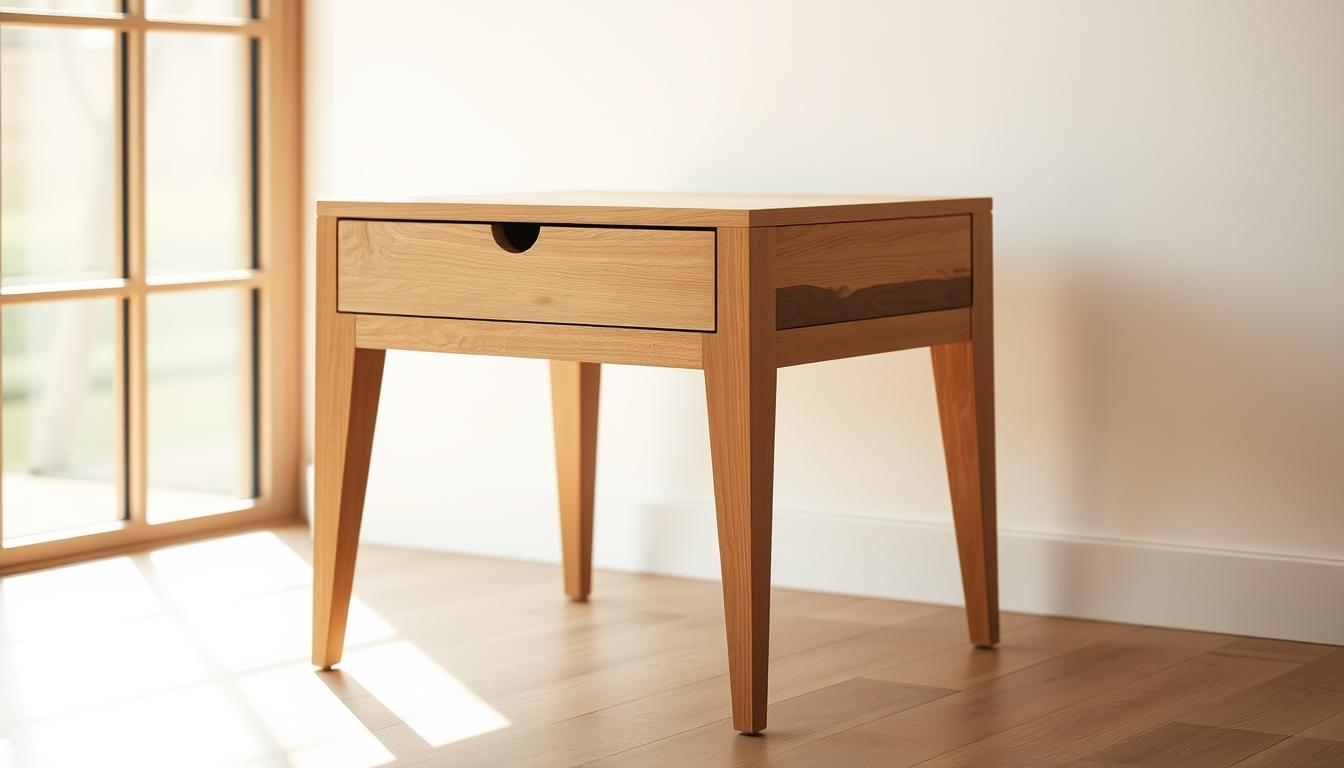
A Nordic wooden end table shows these qualities, making any room look better.
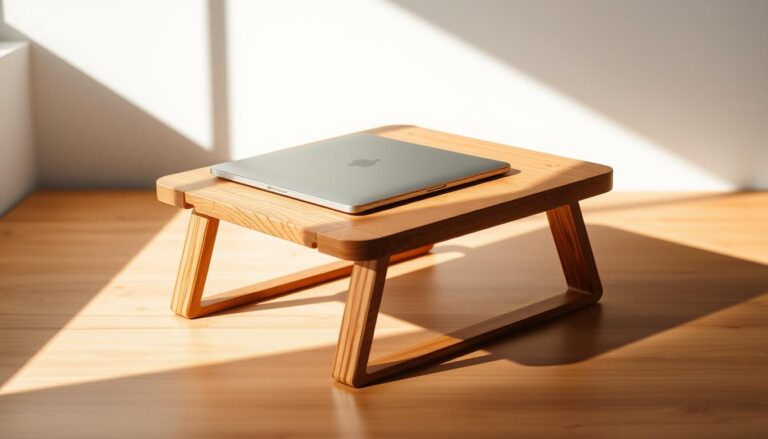
Why Choose a Wooden Side Table?
A modern Scandinavian wood side table has many uses in a home. It’s not just for lamps or drinks; it adds to the room’s look and fits with many styles. Its design promotes balance and simplicity, perfect for minimalist and diverse interiors.
Adding a wooden side table upgrades your interior design and shows you value good craftsmanship. It’s a choice that echoes Scandinavian design values, making daily life more beautiful.
Materials Needed for Your Project
To make a stunning wooden Scandinavian accent table, choose the right materials carefully. The type of wood plus other supplies and tools are crucial. This guide will help you pick everything you need for a beautiful Scandinavian-style bedside table.
Selecting the Right Type of Wood
For your table, pine and birch are great choices. Pine is light and has a light color, perfect for that Scandinavian feel. Birch is tough and has a smooth grain, great for everyday furniture. Both woods are easy to work with using common tools.
Additional Supplies You’ll Need
You’ll need more than just wood for your project. Essential items include:
- Screws – for securing joints
- Wood glue – for added stability
- Sandpaper – for smoothing surfaces
- Finish or paint – to protect and beautify your table
These supplies will help make a durable, good-looking wooden Scandinavian table.
Recommended Tools for Assembly
Putting your table together needs certain tools. You must have:
- Saw – for cutting wood to size
- Drill – for making holes and screwing parts together
- Measuring tape – for exact measurements
- Level – to make sure your table is not wobbly
With these tools, assembling your Scandinavian style bedside table will be easier.
Planning Your Design
Starting with a beautiful Scandinavian furniture nightstand takes careful planning. You need to measure accurately, make detailed drawings, and choose the right finishes. These steps make sure the side table fits your space and matches your design dreams.
Measuring for the Perfect Size
First, look at where you want to put your nightstand. Measure the space for height and width. A nightstand that’s measured well makes the room flow better. It should be balanced in size to be both useful and look good.
Sketching Your Table Concept
Before putting it together, draw your table idea. This helps make your ideas clear. Add clean lines and simplicity for that Scandinavian style. Your drawings will guide you as you build your nightstand.
Choosing the Right Finish
It’s important to pick the right wood finishes for your DIY nightstand. Decide if you want a natural look or a colorful stain. Think about how these choices fit with your room’s design. Choose finishes that last long, are easy to keep up, and make your wood look great.
Cutting the Wood
Before you start cutting wood for furniture, remember safety is key. Proper techniques and safety gears protect you and make your work precise. This section will guide you through woodworking safety, cutting steps, and how to get smooth edges.
Safety Precautions While Cutting
Safety is crucial in woodworking. Always take these steps:
- Wear safety glasses to protect your eyes from wood chips and dust.
- Use hearing protection with loud power tools.
- Keep your workspace clean and without tripping hazards.
- Keep your hands away from cutting areas. Use guides when needed.
- Learn about your tools beforehand to use them safely.
Step-by-Step Cutting Guide
Follow this guide for precise wood cuts:
- Collect your tools, like a saw, measuring tape, and square.
- Measure your wood as per your design needs.
- Draw your cut lines clearly with a pencil.
- Secure your wood to prevent it from moving during cuts.
- Cut slowly and with control.
Tips for Clean Cut Edges
For a professional finish, smooth edges are key. Try these tips:
- Choose a fine-toothed saw for neat cuts and less splintering.
- Cut just outside your marked lines for precise dimensions.
- After cutting, lightly sand the edges to smooth out rough spots.
Assembling the Table
When you start to put together wooden furniture, paying close attention to the details is key. Using the right ways to join pieces is essential for a strong and good-looking wooden table. It’s important to know how each technique works to make sure your table lasts a long time.
Joining Techniques to Use
There are various woodworking joints that help make your project strong. Mortise and tenon joints add a lot of strength and stability. For beginners, pocket hole screws are easier to use. Dowels are good for a nice look and also provide support. Choosing the best method is very important for your table’s quality.
Importance of Dry Fitting
Doing a dry fit before you fully assemble your table is a very critical step. It lets you line up the pieces just right without any glue. This checks that all parts fit well and prevents problems later. Following these tips when building a table can save you from making big mistakes.
Common Mistakes to Avoid
Making mistakes while building your table can cause trouble later. Using too much glue can get messy, and not rechecking measurements can lead to parts not fitting right. Being aware of these problems helps you do a better job and enjoy your table for many years.
Sanding and Finishing Your Table
Sanding and finishing are key to making a durable, beautiful Scandinavian wooden side table. Sanding makes the surface even and ready for stains or paints. This part will show you how to sand, the finishes you can use, and how to apply them to make your furniture look its best.
The Sanding Process Explained
First, you need to sand the table well before adding any finish. Start with rough sandpaper to get rid of bumps. Then, use finer sandpaper to make the surface smooth. You can use hand sanding, block sanding, or an orbital sander, based on what you prefer.
Types of Finish to Consider
Different finishes can give your wood furniture various looks. Here are some common options:
- Oil Finishes: They soak into the wood and make the grain stand out, giving a natural appearance.
- Varnishes: Varnishes form a tough layer that protects against scratches and moisture.
- Paint: Paint lets you be creative, offering endless colors to match your style.
Applying Stain or Paint
To finish, stain or paint your table to get the look you want. Prepare the surface with a final sanding. Use a brush, roller, or cloth to apply the stain in line with the wood grain. For painting, apply a primer first for solid coverage. Take your time to get the best outcome.

Adding Final Touches
After building your Scandinavian side table, it’s time for the details that make it unique. These final touches help your furniture look great and match your home. Think about hardware, customization, and how you’ll style your table.
Recommended Hardware and Accessories
Choosing the right hardware is key to a Scandinavian look. Pick simple legs and knobs that go well with the wood. Wrought iron or brushed brass are top choices. They work well and highlight the wood’s beauty. These details can turn your table into a stylish highlight.
Customization Options
Customizing your table makes it truly yours. Try out different stain colors or unique engravings. Consider mixing wood with woven fabrics for a cozy feel. This lets you add your own touch while keeping a simple Scandinavian style.
Styling Your Scandinavian Side Table
Decorating your side table is fun but challenging. Aim for both function and beauty. You might use a vase with fresh flowers, select books, or a stylish lamp. Grouping items in threes looks good and keeps things simple. Choose a few accessories that show your personal style.
Maintenance Tips for Longevity
It’s key to take good care of your Scandinavian wooden side table. This will be for its durability and beauty. By following simple wood care tips, you can maintain your furniture well. Doing regular maintenance will make your table last longer and stay beautiful.
Cleaning and Care Instructions
Cleaning your table often is important to keep its natural beauty. Wipe it with a soft, lint-free cloth every week. For a deeper clean, use a mild soap and water mix. Make sure the cloth is just damp, to avoid water damage. Stay away from harsh chemicals that could harm the wood’s finish.
Dealing with Scratches and Dents
Scratches and dents can happen to wooden furniture. For small scratches, a little walnut oil or furniture polish works well. Use a soft cloth to apply it. If you have deeper dents, try using a damp cloth and a hot iron to fix them. Giving these spots regular care can really make a difference.
Long-Term Care Practices
For the furniture to last, add a protective finish every couple of years. This helps to guard against damage. Always tighten any loose parts. Also, keep the table away from direct sunlight and moisture to prevent it from getting warped. These smart care tips will help your side table remain a valuable piece in your home for a long time.

| Maintenance Task | Frequency | Description |
|---|---|---|
| Dusting | Weekly | Use a soft cloth to remove dust |
| Deep Cleaning | Monthly | Mild soap solution for thorough cleaning |
| Scratch Repair | As Needed | Apply walnut oil or polish to minor scratches |
| Protective Finish Application | Every 1-2 Years | Reapply a protective finish to enhance durability |
| Inspection | Bi-Annually | Check for stability and general wear |
Conclusion and Next Steps
Making a Scandinavian wooden side table is more than just creating furniture. It is a rewarding experience that combines planning, precision, and creativity. You now understand the basics of Scandinavian design and the importance of picking the right materials. You also know how to cut, assemble, and finish your table. Each step is key to getting the function and style of Scandinavian designs right.
Now’s a great time to start your DIY project. With what you’ve learned here, you can confidently make your own side table. Imagine how good it will feel to finish a piece of furniture that adds to your home. Take on this challenge and let your creative side show by turning your vision into reality.
If you need extra help, there are many woodworking resources out there. You can find video tutorials, advanced tips, or join community forums for support. So get ready, grab your tools, and start this exciting project. Happy creating!