Did you know the average office worker uses about 10 pens and pencils each day? With so many writing tools, keeping a tidy workspace is key. Making your own pen holder, or porta-canetas artesanal, not only cleans up your desk but also gives it a personal touch.
In this guide, we will show you how to create a DIY pencil holder. It will reflect your style and be a useful desk organizer. From picking materials to adding your own flair, you’ll find all you need here to make a standout handmade pen holder.
Introduction to DIY Pencil Holders
Making a DIY pencil holder is a fun way to mix creativity with practical use, giving you both an attractive and handy item. You get to make something that truly shows off your personal taste while keeping your desk tidy. Plus, finishing a project like this leaves you feeling proud of what you’ve accomplished.
What is a Porta-Canetas Artesanal?
A handmade pen holder, or porta-canetas artesanal, is a special container for your writing tools. They can be made from different materials like wood, recycled goods, or fabric. What makes these pen holders special is their unique look and the love put into making each one, ideal for those who love custom crafts.
Why Make Your Own?
Building your own pen holder can save you money and be very rewarding. You can use what you have lying around, which helps cut costs and reduces waste. It’s great because you can pick the design, colors, and textures, making your desk space truly yours. Crafting a porta-canetas artesanal turns an average desk into something special.
Benefits of DIY Projects
DIY projects come with lots of great perks, making them an awesome experience. Some benefits include:
- Boosted creativity from trying out different designs.
- Less mess by neatly storing your pens and pencils.
- Learning new skills by doing everything yourself.
- Feeling great for making something one-of-a-kind.
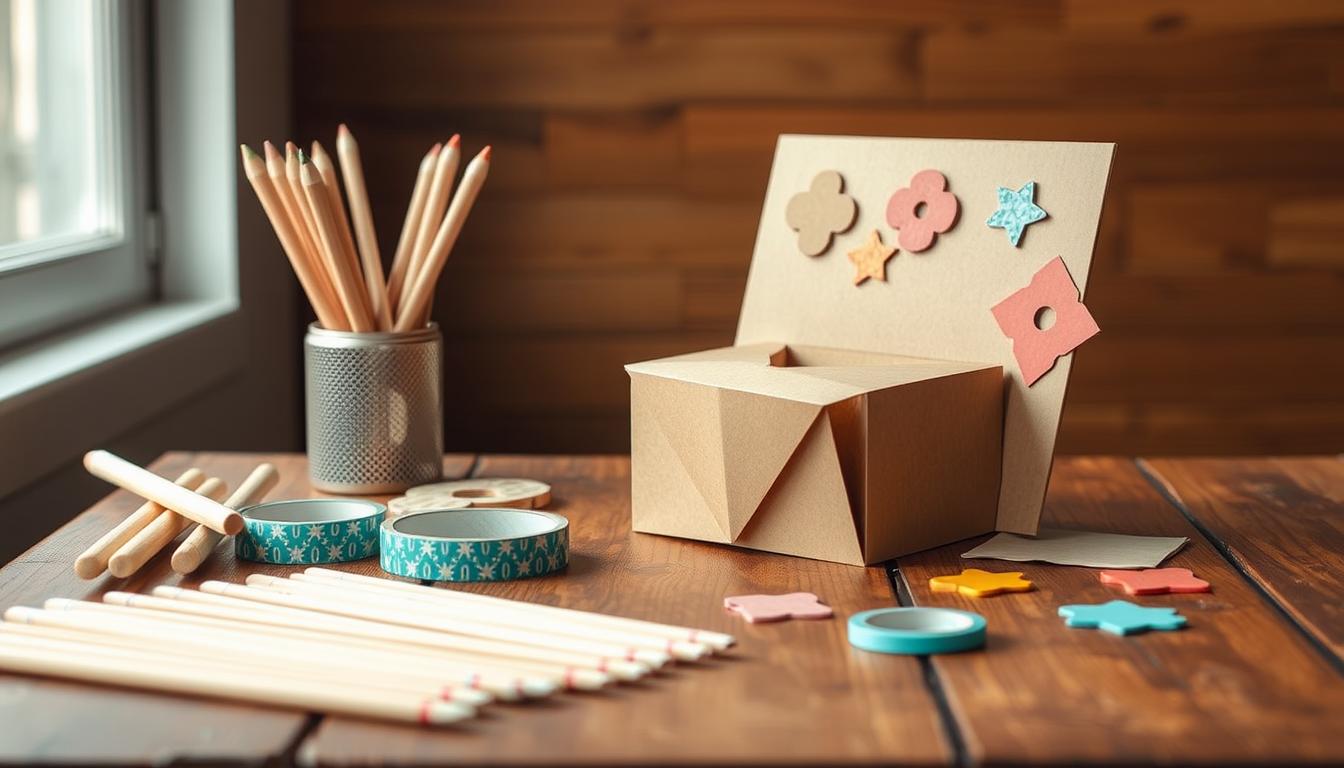
Materials Needed for Your Project
Making a DIY pencil holder means you need certain materials. These help bring your design to life. You might keep it simple or add special touches with decorations. Knowing what you need makes everything smoother. Here’s a list of basics and extras for your project.
Essential Supplies List
- Cardboard or plastic containers for the base
- Glue or adhesive tape for assembly
- Scissors or a craft knife for cutting
- Ruler for measuring and ensuring accuracy
- Pencil for marking dimensions
Optional Decorative Items
- Paint or markers for coloring
- Stickers or decals for personalization
- Fabric scraps for additional texture
- Ribbon or twine for embellishments
- Buttons or beads for added flair
Gathering these materials gets you ready. With these supplies, you’ll build a cool DIY pencil holder and desk organizer. This prep lets you enjoy a fun and rewarding craft project.
Step 1: Choosing the Base for Your Holder
Starting your porta-canetas project begins with picking the best base. A solid base makes your holder useful and stable. Luckily, you have many choices, from usual materials to clever recycling ideas.
Options for Base Materials
You can pick base materials that look good and are practical. Here are some usual options:
- Cardboard – Easy to shape and make your own, so it’s a favorite choice.
- PET bottles – These can be trimmed and reused in different ways.
- Wood – Strong and adds a natural look, but you might need extra tools.
- Cans – Things like mint tins give a cool industrial vibe.
Recycling Household Items
Using recycled items can save money and help our planet. Many things at home can become porta-canetas materials:
- Old jars – Mason jars can be prettied up for an attractive pencil holder.
- Toilet paper rolls – Wrap them in nice paper for a smart look.
- Egg cartons – Cut and mold them for a special, eye-catching holder.
Step 2: Designing Your Pencil Holder
Before making your pencil holder, it’s important to plan its design. Think about what you need it to do and how you want it to look. A well-thought-out design can make your workspace look and work better.
Sketching Your Ideas
Begin by drawing different ideas for your project. Explore various shapes and ways to organize it. Use colors and textures to bring your ideas to life. A drawing helps keep your project on track.
Choosing the Right Size
Think about how much space you have and how many items you want to store. Measure your desk area to pick the right size. Your pencil holder’s size and design should match your workspace well.
| Design Idea | Recommended Size | Notes |
|---|---|---|
| Cylindrical Holder | 4-6 inches in diameter | Good for short pens and pencils |
| Multi-compartment Organizer | 10×5 inches | Allows for better organization |
| Decorative Box Style | 8×4 inches | Great for artistic flair |
Step 3: Cutting and Shaping the Base
Choosing the right tools is important when making your pencil holder. They help you make clean and precise cuts. Also, knowing how to shape your materials is key. And remember, staying safe should always be your top priority.
Tools You’ll Need
Here’s what you’ll need to start cutting:
- Scissors: Ideal for cutting through lighter materials like cardboard or paper.
- Craft Knife: Perfect for making precise cuts on sturdier materials, such as wood or thick cardboard.
- Cutting Mat: Protects your work surface while providing a stable base for cutting.
- Ruler: Ensures straight cuts and accurate measurements.
Safe Cutting Techniques
To craft safely, follow these DIY safety tips:
- Always cut away from your body to minimize the risk of injury.
- Keep your hands clear of the cutting path to avoid accidents.
- Use cutting tools that are suitable for the material you are working with.
- Wear safety glasses if you expect debris to fly while cutting harder materials.
By mastering these cutting and shaping techniques, you’ll lay a great foundation for your DIY pencil holder. This will lead to amazing results in your crafting project.
Step 4: Assembling Your Porta-Canetas Artesanal
Building your pencil holder is all about focusing on details and choosing the right way to join parts. The best glues and joining strategies guarantee your holder will be strong. This part of the guide includes assembly tips that really help make your holder last longer.
Joining Materials Together
First, lay out all parts to see how they fit. For DIY projects, people often use wood glue, hot glue, or screws. Pick a glue that fits your materials. Wood glue is great for wooden parts because it sticks them together strongly. If you’re in a hurry, hot glue is fast, but make sure it’s strong enough for what you’ll put in the holder.
Tips for Strong Assembly
Here are some key steps for building a strong holder:
- Glue should go on both surfaces you’re joining.
- Use clamps or rubber bands to hold parts together while the glue dries.
- To make things even stronger, add small screws or nails as decorations.
- Give the glue enough time to dry fully before you use the holder.
Follow these assembly tips and methods, and you’ll create a pencil holder that’s not just nice to look at but also durable.

| Joining Method | Best For | Pros | Cons |
|---|---|---|---|
| Wood Glue | Wood materials | Strong bond, easy to apply | Long curing time |
| Hot Glue | Quick projects | Fast setting, versatile | Less durable, may melt |
| Screws | Heavy items | Very strong, easy to replace | Requires drilling, can split wood |
Step 5: Adding Personal Touches
Now that your pencil holder has a shape, it’s time to make it truly yours. Adding personal touches can turn a simple holder into something special. We’ll look at paint techniques, finishes, and decorations that make your holder stand out.
Painting and Finishing Options
Pick colors that you love to make a statement. Acrylic paints are perfect for bright colors and adding depth. You might want to use clear varnish to protect your design and make it shine.
Try using sponges or brushes to create different effects. These final details not only look great but also keep your holder from getting scratched.
Using Decals and Stickers
Decals and stickers are a fun way to add flair to your holder. Choose patterns or quotes that show off your style. Place them in unique spots for an eye-catching look.
Decals are a quick way to make your holder pop and express who you are.
Step 6: Final Assembly and Details
At this point, putting everything together correctly is key. Making sure every piece is well attached not only makes it last longer but also looks better. With some straightforward steps, you can turn your DIY pencil holder into an eye-catching piece. Let’s get into the how-tos.
Securing All Parts Together
For a solid build, pick a strong glue that works with your materials. Spread the glue carefully and press the parts firmly until they stick. If your holder is heavy, think about using screws or nails to make it even stronger. This will make sure your holder stands up well over time.
Final Touches for a Professional Look
Paying attention to the small things can make your holder look expert-made. Use sandpaper to smooth any sharp edges. Then, apply some paint or varnish for a sleek finish. Why not add some washi tape or decals that match your style too? These final details don’t just boost the look but also show off your unique flair.

| Step | Action | Purpose |
|---|---|---|
| 1 | Secure components with adhesive | Enhances durability |
| 2 | Use screws/nails for reinforcement | Increases stability |
| 3 | Smooth edges with sandpaper | Achieves a polished finish |
| 4 | Add paint or varnish | Improves appearance |
| 5 | Incorporate decorative elements | Enhances overall look |
Troubleshooting Common Issues
Working on DIY projects can bring a lot of joy but also some problems. You might face issues like your pencil holder not holding up or not looking right. Fixing these issues quickly can keep your project fun. We have some tips to get things back on track.
What to Do If It Falls Apart
If your pencil holder begins to fall apart, check how it’s put together. Look at the weak spots first. Make sure you’re using the right glue or adhesive for your materials. You might want to:
- Reapply glue and hold the sections together until set.
- If using screws or nails, check their tightness and replace any that appear weak.
- For wooden bases, adding corner brackets can provide additional support.
If it’s really broken, think about redesigning it. Consider how strong your new design needs to be before starting again.
Fixing Aesthetic Mistakes
At times, your pencil holder may not look the way you hoped. Issues with its appearance can lessen your enjoyment. To fix or improve these problems, you could:
- Consider a fresh coat of paint to cover uneven spots.
- Decals or stickers can hide imperfections while adding a personal touch.
- If the shape is uneven, sand down rough edges and add decorative elements to distract from flaws.
View fixing these mistakes as part of being creative. Use these challenges to try new styles and ideas. This way, even setbacks can lead to something special.
Displaying Your Handcrafted Pencil Holder
Once you’ve finished your DIY pencil holder, it’s time to show it off. Find the perfect place to make it stand out. It might look great on your desk or a shelf in your home office or classroom. This not only shows off your work but also inspires those who love DIY projects.
Also, your pencil holder could be a great gift. Think about making it special for friends or family. By adding their favorite colors or designs, you create a meaningful present. These handcrafted gifts, like your pencil holder, truly stand out.
Showing your DIY projects or giving them as gifts is more than just functional. It’s a way to share art and creativity. Every piece, including your pencil holder, tells the story of your creativity.