Did you know that using burnt wood in home decor can reduce the carbon footprint of your project by up to 30%? This method is not just eco-friendly but also gives your decor a unique and beautiful texture. In this guide, we’ll show you how to make a stunning painel decorativo com madeira queimada. You’ll turn ordinary wood into a show-stopping burnt wood decorative panel, adding a touch of rustic charm to any room.
This step-by-step guide will teach you the art of creating a warm, natural look. It’s perfect for any home style, from modern to classic. Get ready to boost your home’s style and make a piece that gets everyone talking about your creativity!
Why Choose Burnt Wood for Decoration?
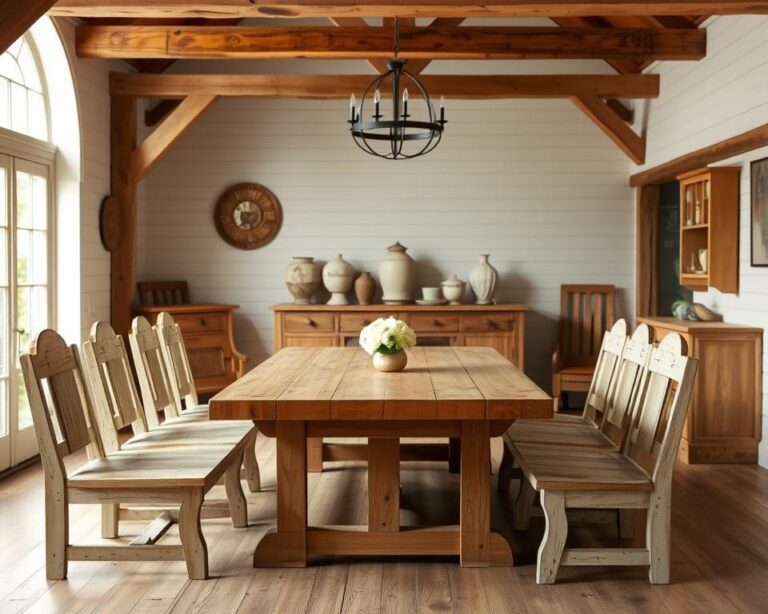
Burnt wood brings beauty and a green mindset to decorating. It adds a warm feel, turning rooms into cozy spots. Its unique look gives free reign to creativity, matching many styles.
Unique Aesthetic Appeal
Burnt wood panels catch the eye with their charred textures and deep colors. They add a rustic touch that draws people in. These textures beautifully complement both modern and traditional decors.
Eco-Friendly Materials
Using burnt wood shows you care for the planet. It uses reclaimed wood, cutting down on waste and adding beauty. This approach is good for the earth and looks great, too.
Versatility in Design
Burnt wood fits many design themes, from farmhouse to modern. It offers countless ways to personalize your space. You can make standout pieces that are both pretty and useful.
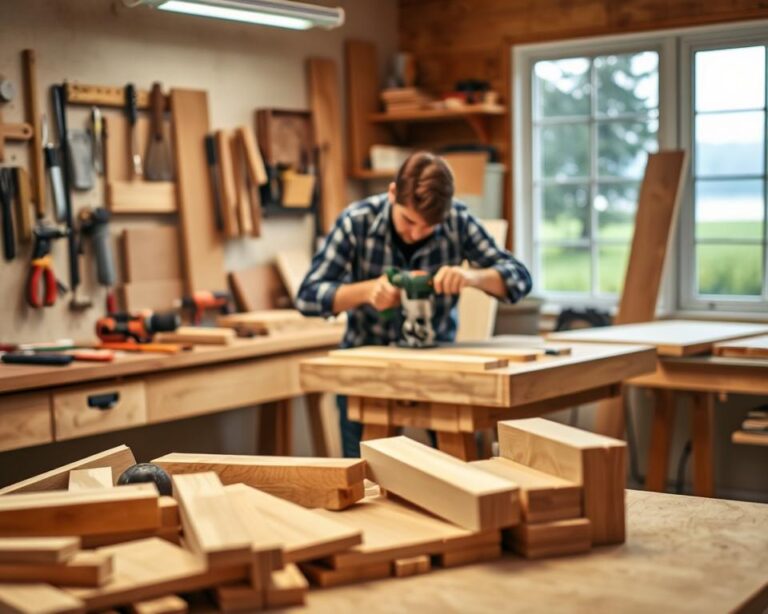
Tools and Materials You’ll Need
Starting a burnt wood project means you need to gather some tools and materials first. You will need the right tools, the best types of wood, and safety equipment. Being ready ahead of time makes crafting more fun and helps you create an eye-catching decorative panel.
Essential Tools for the Project
To make your burnt wood projects easier, certain tools are a must-have. Here are the key ones:
- Jigsaw: Perfect for cutting wood into different shapes.
- Drill: Great for making holes and piecing things together.
- Burning tool: A must-have for that burnt wood look.
- Sandpaper: Smooths out rough spots.
- Measuring tape: Helps make sure everything fits just right.
Types of Wood Suitable for Burning
The kind of wood you pick can make or break your project. Here are some top choices:
- Pine: It’s easy to handle and looks great charred.
- Cedar: Smells nice and fights decay naturally.
- Birch: Light and smooth, it’s perfect for burning.
Safety Equipment and Precautions
Your safety always comes first in any project. Make sure to use:
- Gloves: Keep your hands safe from burns and scratches.
- Goggles: Protect your eyes from dust and flying bits.
- Mask: Avoid breathing in any harmful smoke.
Having the right tools, picking the best wood, and staying safe are key to a great crafting experience.
Preparing Your Workspace
Setting up an efficient workspace is key for any woodwork project. A tidy space boosts safety, productivity, and enjoyment. Start by picking a good spot. Then, make sure the area is safe for woodworking. Finally, organize your tools and materials well.
Choosing the Right Location
Pick a place with enough air and space to move freely. Outdoor spots or big garages are best. These places should also have good lighting to help you see well when working.
Setting Up a Safe Area for Woodwork
Make safety your top priority in your workspace. Keep it clean and free from clutter. Also, have fire safety tools ready. This helps you avoid distractions and accidents. Have a specific spot for burning wood that’s away from anything flammable. This keeps your woodwork area safe.
Organizing Your Tools and Materials
Keeping things organized is crucial for working better. Place your tools in a way that you can easily get what you need. Use shelves, pegboards, or toolboxes to keep everything in order. Being organized means you spend less time looking for stuff and more time enjoying woodworking.
Creating the Burnt Wood Finish
Turning wood into a beautifully charred surface needs both careful execution and patience. It’s important to learn the right techniques for burning wood safely. This way, you can get the look you want without risks. Controlling how much you char the wood is key to getting the perfect finish. You might want a light toast or a deep, rich char. Then, cleaning the wood right afterwards keeps it looking good and ready for more work.
Techniques for Burning Wood Safely
Safety comes first when working on a burnt wood finish. Here are some good ways to burn wood without getting hurt:
- Use a propane torch for controlled flames.
- Maintain a safe distance and wear protective gear such as gloves and goggles.
- Always have a fire extinguisher nearby to handle unexpected flare-ups.
- Work outdoors or in a well-ventilated area to avoid smoke inhalation.
Achieving the Desired Char Level
The level of char you choose changes how your wood looks in the end. Here’s how to get the char level just right:
- Begin with a moderate flame and gradually increase the intensity.
- Continuously monitor the wood to avoid burning it beyond the desired level.
- Experiment with different woods to see how they react to heat.
- Use a heat gun for finer control over smaller areas.
Cleaning the Wood After Burning
After burning, cleaning the wood is crucial for the next steps. Follow these tips:
- Let the wood cool completely before handling.
- Use a soft brush to remove soot and ash from the wood surface.
- Wipe down the surface with a damp cloth for a thorough clean.
- Consider using a vacuum with a brush attachment for stubborn debris.

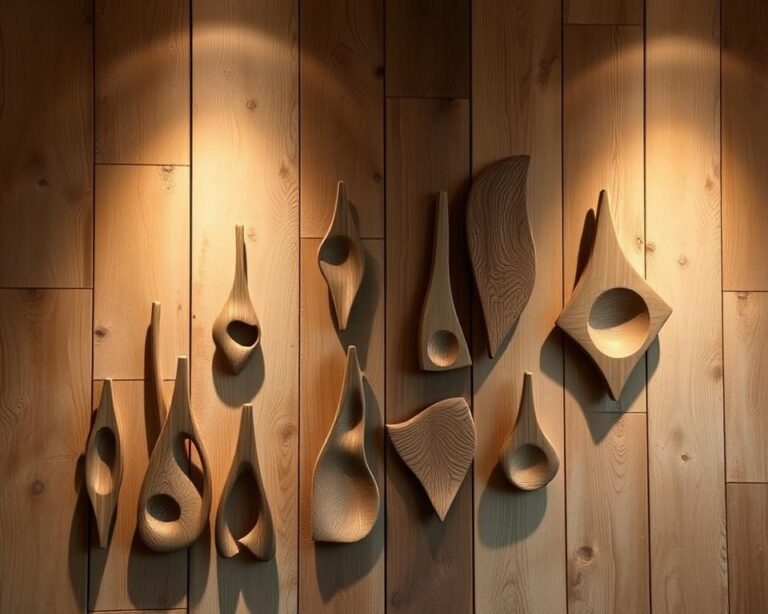
Designing Your Panel Layout
Making a panel look good is all about balance. The artistic aspect shows the project’s true spirit. This invites creativity with different designs. You have to measure and cut carefully to ensure everything fits perfectly.
Ideas for Panel Patterns
There are many patterns you can use to make your project stand out. Here are some fun ideas:
- Chevron Patterns: Zigzags make a bold statement.
- Herringbone Layout: It’s a classic look with depth.
- Geometric Shapes: Use shapes like triangles for a fresh look.
- Random Placement: Mix pieces randomly for a modern style.
Measuring and Cutting Wood Pieces
Start by measuring wood correctly. A tape measure and a square are essential. This helps avoid mistakes. Then, consider these steps when cutting:
- Figure out how long and at what angle to cut.
- Make your marks clear for precision.
- A miter saw is great for angled cuts.
Tips for Symmetry and Balance
For a polished look, aim for symmetry. Our eyes like designs that are balanced. Use these tips to help with placement:
- Begin with a central piece, then add others around it.
- Spread similar items evenly.
- Adjust the spacing to get the look just right.
Assembling the Panel
When you work on a decorative project, putting together the wood panel is key. It’s important to connect the wood pieces properly to make your creation strong and long-lasting. There are many ways to join your wood, from using glue to choosing screws or nails.
Joining Your Wood Pieces Securely
For a solid build, explore different joining methods. Wood glue is easy to use and creates a strong bond after it dries. Dowels help line up the pieces correctly when placed in pre-drilled holes. Both methods ensure a sturdy wood panel.
Using Adhesives vs. Mechanical Fasteners
Choosing between glue and screws depends on your project’s needs. Glue leaves a smooth look without any visible parts, which is great for looks. Screws or brackets, however, give quick strength, good for projects that need to hold weight. Think about the advantages of each to pick the right one for your work.
Reinforcing the Structure of Your Panel
To make your panel last even longer, add extra support. Use corner brackets or extra wood pieces to stop it from bending out of shape. Always check your panel’s size and style to figure out the best way to strengthen it.

Finishing Touches for Your Panel
Once you’re done building your decorative panel, it’s time for the finishing touches. This includes smoothing the edges, sealing the wood, and adding decorations. Each of these steps is key to making your panel look its best.
Sanding and Smoothing Edges
Smoothing the edges makes your wood panel look nicer and safer. Start with rough sandpaper and then use smoother ones. Make sure to smooth any jagged spots to avoid splinters. A little time spent on sanding edges can make a big difference, giving your project a polished look.
Applying Sealants or Stains
Keep your panel looking good longer by applying sealants or stains. You can choose from products like polyurethane or natural oils. These not only protect the wood but can also highlight its natural beauty. Choosing the best product for your panel can greatly affect how long it lasts and how it looks.
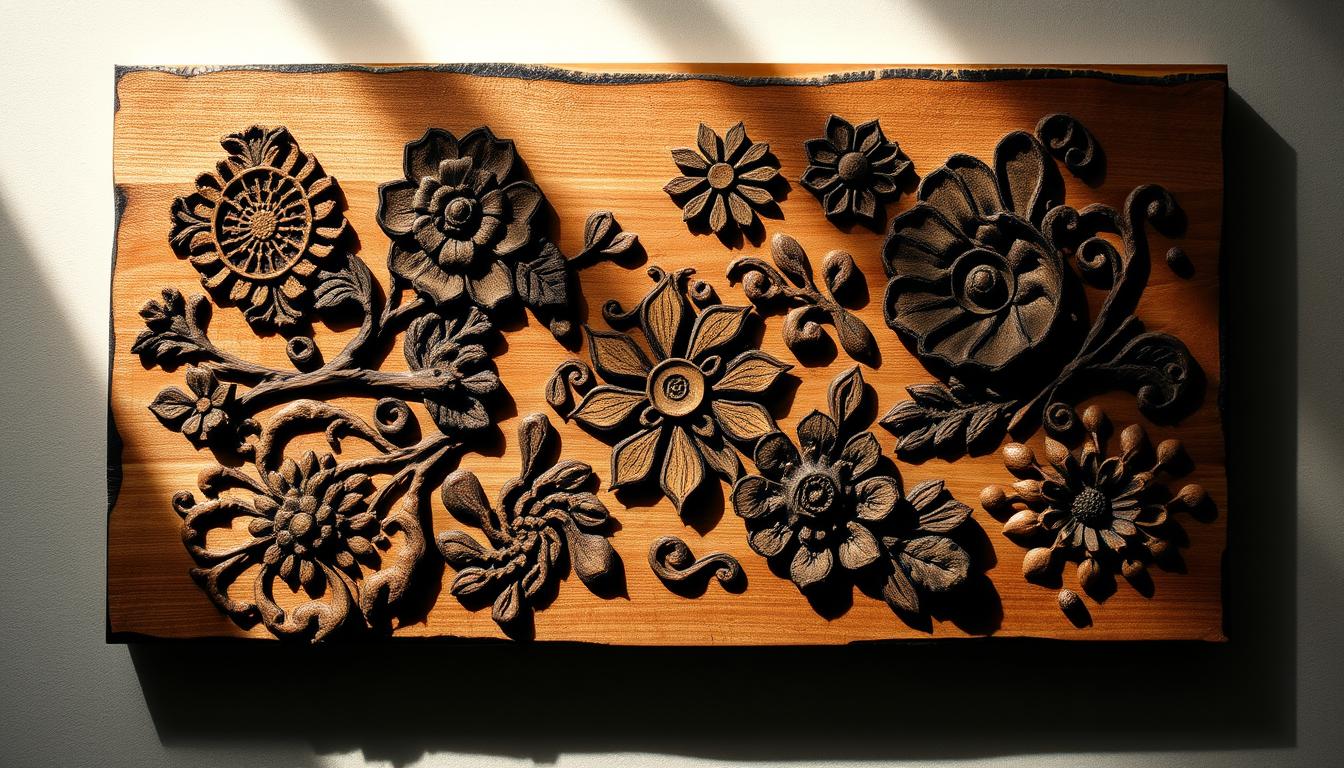
Adding Decorative Elements
Adding fancy touches can make your wood panel come alive. Think about using small lights, art, or designs that show your personality. These details can make your panel unique and eye-catching. Try out different decorations to see what best adds to your work.
| Task | Description | Purpose |
|---|---|---|
| Sanding Edges | Using sandpaper on rough edges. | Creates a smooth finish and prevents splinters. |
| Applying Sealants | Waterproof or protective coatings on wood. | Enhances durability and preserves the wood finish. |
| Adding Decorative Elements | Incorporating lights, art, or custom designs. | Enriches visual appeal and personalizes the panel. |
Mounting Your Decorative Panel
Mounting your decorative panel correctly makes it look better and keeps it safe. You need to pick the right spot, choose the right hardware, and make sure it’s mounted firmly. This will help you create a beautiful center of attention in your area.
Choosing the Right Wall for Installation
Finding a wall that matches the style and can hold your wood panel is crucial. Look for walls that are easy to see and go well with the decor. You should choose strong walls, like those made of drywall or plaster, which can carry the weight.
Hardware Options for Hanging
There are many ways to hang a decorative panel. Make sure the hardware can handle the panel’s weight. You can use:
- Wall anchors for lighter panels
- Heavy-duty brackets for heavier ones
- Picture hooks that spread out the weight
Pick the best option for your panel after looking at all the choices.
Tips for a Secure and Level Mount
Mark the spot properly before starting to hang your panel. Use a level to get it just right and avoid a slanted look. Making sure it’s firmly attached is key. Always measure twice before you start drilling or hammering in the hardware.
Maintaining Your Burnt Wood Panel
It’s crucial to take care of your burnt wood panel to keep it beautiful and long-lasting. You should clean it well, keep it dry, and fix any issues when needed. Doing this will make sure it stays lovely for years.
Regular Cleaning Techniques
Start with gentle dusting for your burnt wood panel. Use a soft, dry cloth or a microfiber duster. This approach helps get rid of dirt without harming the wood.
If you spot tough stains, a mild soap solution might help. But first, always test cleaners on a small spot to avoid damage. These simple cleaning steps will help keep your panel bright and appealing.
Avoiding Water Damage
Keeping your burnt wood panel safe from water is very important. Don’t place it in damp places like kitchens or bathrooms. Protect the wood with a quality sealant to block moisture. Look for varnishes or sealers made for wood finishes. This will help stop the wood from warping or getting moldy as time goes by.
Periodic Touch-Ups and Repairs
Now and then, check how your burnt wood panel is doing. Look for spots where the finish is coming off or the wood looks dull. Quick fixes with the right stains or sealers can make it look new again.
Regularly inspecting the panel helps ensure it remains in great shape, showcasing your beautiful work.
Revamping Your Panel Over Time
Refreshing your decorative wood panel can be very rewarding. You can change its stains or add new elements, making it stand out. This process lets you match your panel with your style or the season’s theme.
Changing the Look with New Stains
Applying a new stain can give your wood panel a whole new look. Trying different shades and finishes can transform it completely. You can choose dark stains for warmth or light ones for a modern feel. This change can help you see your panel in a new light.
Adding New Elements or Accessories
Adding decorations can make your panel exciting again. You can use seasonal items, photos, or art. This lets you be creative and keeps your panel interesting. It shows off your changing tastes and what you love.
Seasonal Themes and Adjustments
Think about changing your wood panel for the seasons or holidays. Adding autumn leaves or winter decorations brings the season’s spirit into your home. These changes keep your decor fresh and timely. Your wood panel can always feel special and personal.
Conclusion: Enjoying Your Decorative Creation
After making your burnt wood panel, it’s time to enjoy it. Look closely at the piece you made. Each flaw and char mark adds to its special story. It’s unique. Talk about how you made it with friends and family. Doing this can be really fun. Whether you share your story online or in person, it might motivate others to start their own projects.
Think about where to put your panel so it gets noticed. A spot where it stands out can make your room look better. And it shows off your creativity. It could hang above a mantel, in a hallway, or be the main attraction in your living room. Wherever you place it, it’ll definitely grab attention. By choosing the right spot, you show off your style through your art.
Sharing your DIY project can inspire a community of creative people. When you share what you’ve done and how you did it, others might try their hands at something new. Your panel isn’t just for decoration. It could inspire others to create, too. This spreads the happiness and pride of making something beautiful yourself.