Did you know water damage costs homeowners over $9 billion every year in the U.S.? This fact shows how critical good waterproofing is, especially for bathroom niches. A waterproof niche not only adds storage but also makes your bathroom look better.
We’ll show you how to build a top-notch waterproof bathroom niche. It doesn’t matter if you’re seasoned in DIY or just beginning with waterproofing. We’re here to help make your bathroom both beautiful and useful. Let’s dive into making your own waterproof niche!
Understanding the Benefits of a Waterproof Bathroom Niche
Exploring waterproof niches shows they enhance your bathroom’s look and use. A waterproof niche uses space wisely. It keeps your bathroom clean and good-looking.
Increased Functionality and Storage
Waterproof niches offer smart storage in the bathroom. They make room for your personal stuff, like toiletries and towels. This keeps your space tidy and makes bathing easier.
Enhanced Aesthetic Appeal
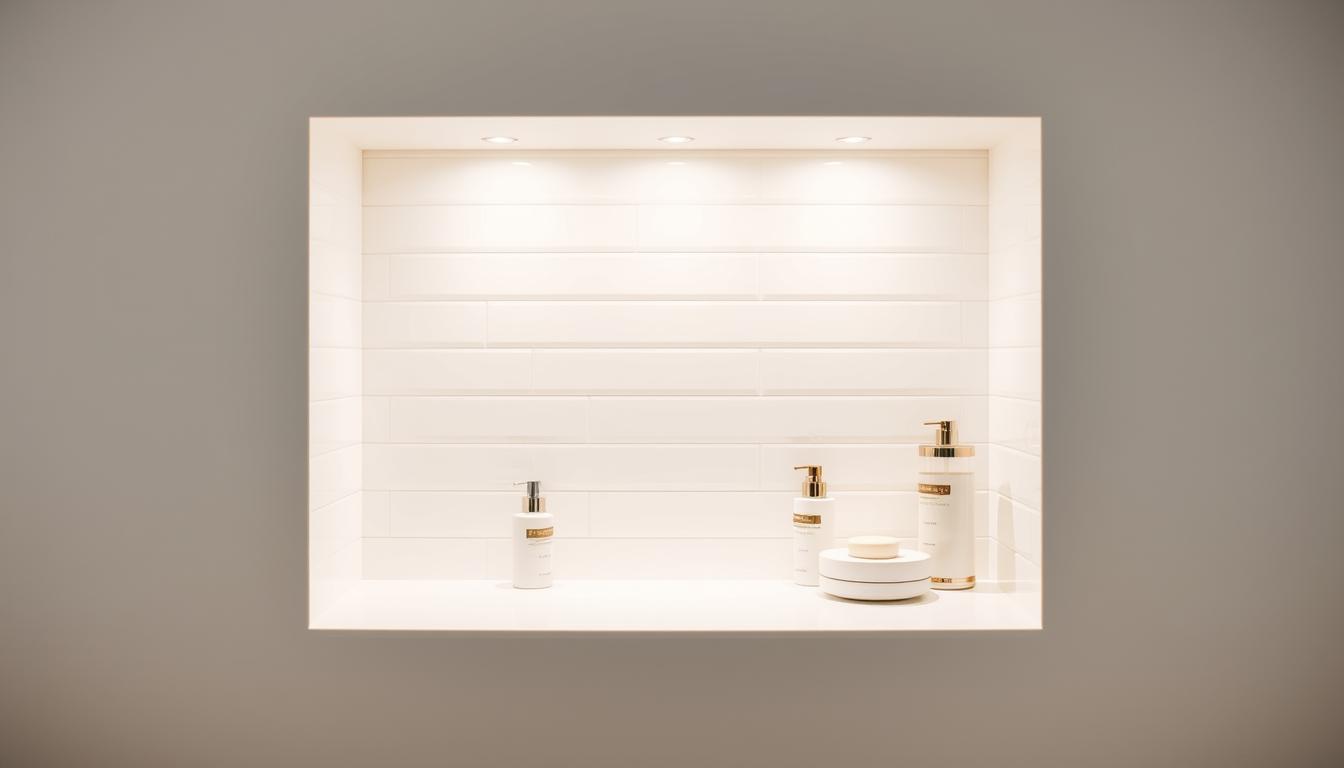
Waterproof niches make bathrooms look better and more modern. Their sleek design and clever placement improve the space’s vibe. They can be highlighted with cool tiles or lighting, making your bathroom feel like a luxury escape.
Reduced Mold and Mildew Risks
Waterproof niches are important for stopping mold. They keep moisture away, leading to a healthier bathroom. This keeps your bath area lasting longer and is better for your family’s health.
| Benefit | Description |
|---|---|
| Functionality | Offers organized storage solutions, reducing clutter. |
| Aesthetic Appeal | Adds modern design elements and enhances ambiance. |
| Mold Prevention | Minimizes moisture accumulation, improving health and hygiene. |
Essential Materials for Your Waterproof Niche
To make a waterproof bathroom niche, you need the right materials. This means picking the best tiles, using effective waterproofing membranes, and having the right DIY tools. It’s all about durability and making it work well.
Choosing the Right Tiles
Tiles play a big role in how your bathroom niche looks and lasts. Go with porcelain or ceramic because they resist water. These choices look classy and are easy to keep looking good.
Choose tiles that are simple to clean. This way, your niche will look great for a long time.
Waterproofing Membranes
Waterproofing stops leaks and water damage. You can choose from sheet membranes or liquid membranes. Sheet membranes are thick and strong. Liquid membranes give a seamless layer of protection. Pick the one that fits your project best.
Tools You’ll Need
Having the right DIY tools makes the job easier. You’ll need:
- Tile cutters for the right tile size
- Waterproofing brushes for the membranes
- Saws to cut materials
- Measuring tape for exact measurements
- Level to keep things straight
With these key materials and tools, you’re ready. You can create a waterproof bathroom niche that looks good and works well.
Step 1: Planning Your Niche Location
Planning your bathroom niche needs careful thought and strategic decisions. It’s not about picking a spot randomly. You must look at the space carefully to make sure it fits. Measuring for renovations is crucial. It checks that your niche will fit well. You should also think about how easy it is to get to. Putting it near places you often use, like the shower or sink, is smart.
Measuring the Space
Getting the right measurements is key to making your idea work. Start by checking the wall’s height and width. Make sure to add some extra space around the niche to make it easier to use. Below is a simple table that can help you:
| Measurement | Details |
|---|---|
| Height | Ensure the niche is easily reachable for all users. |
| Width | Allow enough room to store toiletries without overcrowding. |
| Depth | A depth of 4 to 6 inches typically suffices for most items. |
Considering Plumbing and Electrical Layouts
Looking into plumbing is also vital when planning your niche. Check the current plumbing setup to avoid any issues. Make sure your niche won’t clash with electrical outlets or switches. Thinking ahead like this makes the bathroom more functional.
Step 2: Preparing the Wall for Installation
Getting the wall ready is key for a smooth DIY bathroom makeover. It creates a strong base for your waterproof niche. To prepare well, you need the right tools for a solid installation.
Tools for Wall Preparation
Get these tools ready for preparing your wall:
- Pry bar: Helpful for carefully lifting wall coverings.
- Stud finder: Essential for locating wall studs and ensuring a secure installation.
- Utility knife: Perfect for cutting through drywall or wall coverings.
- Putty knife: Useful for scraping off residual adhesive or materials.
- Sandpaper: Helps in smoothing surfaces post-application.
Removing Existing Wall Coverings
To remove wall coverings, take it slow for a neat result. Follow these steps:
- Use the pry bar to gently lift tiles or panels starting from the corners.
- Utilize the utility knife to cut through any adhesive or caulking.
- Carefully peel off drywall or tile to avoid damaging the underlying structure.
- Inspect the wall for any damage that may need repairs before proceeding.
After removing wall coverings, make sure the surface is ready for the next steps. This careful preparation helps your new niche stay dry and in place for the long haul.
Step 3: Creating the Niche Frame
Creating a niche frame is a crucial step in renovating your bathroom. It’s important to get the niche’s size and shape right. This ensures it looks good and works well in the space. We will show you how to figure out these dimensions. And we’ll help you build a strong frame that can handle damp conditions.
Determining Size and Shape
First, look back at the measurements you took earlier. Think about what you’ll store in the niche and how it’ll look in your bathroom. A too-small niche might not look right. But a very big one can take over the room’s look. Aim for a size that makes your bathroom look its best.
Building the Wooden Frame
Choose top-notch, moisture-fighting wood like cedar or treated lumber for your frame. This helps your niche last longer in a wet bathroom. Here’s how to build your niche frame:
- Measure and Cut: Cut the wood to your niche’s needed sizes.
- Assemble the Frame: Use screws to connect the pieces securely.
- Secure to the Wall: Fix the frame to the studs in the wall to make sure it’s stable.
- Check for Level: Use a level tool to make sure your frame is perfectly upright before you finish installing it.
A well-built niche frame ensures a lasting feature in your bathroom. Keep precise to make sure it enhances your bathroom’s design.
Step 4: Installing Waterproofing Membrane
Putting in a waterproofing membrane keeps your bathroom niche safe from moisture. You have to pick the right kind and apply it well. This step creates a shield that stops water from getting in. Knowing about different waterproofing ways helps you choose wisely for your project.
Types of Waterproofing Membranes
There are various waterproofing membranes, each with special features:
- Liquid-applied membranes: These are brushed or rolled on the area, making a seamless barrier.
- Sheet membranes: These are large sheets stuck to the area. They’re quick to install and cover evenly.
- Pre-applied membranes: Often used in big projects, these are put on before the base is made. They fully block moisture.
Proper Application Techniques
To control moisture well, apply the waterproof membrane right. Here are tips for a good DIY waterproofing job:
- Clean the area well to get rid of dust, grease, and anything else on the surface.
- Pay extra attention to edges and seams since they can leak easier.
- Use the membrane like the maker says to cover everything well.
Once the membrane is in, let it set as told before you start tiling. This step makes sure your waterproofing keeps the niche safe from water later on.

Step 5: Tiling the Niche
Tiling your niche brings both beauty and function to your space. Choose tiles that can handle moisture and enhance your bathroom’s look. It’s important to pick tiles that match your style and are practical for wet areas.
Selecting Suitable Tiles
Choosing the right tiles means looking at their texture, color, and size. Glossy tiles give a sleek look, while matte ones offer a cozy feel. Make sure they’re rated for wet places for safety and longevity. Think about how your tiles will look with the bathroom’s overall design.
Tiling Techniques and Patterns
Different tiling methods can make your niche stand out. A straight lay pattern is simple yet elegant. For something more eye-catching, try using herringbone or chevron patterns. Whatever design you pick, make sure you have the proper tools for a clean fit. These techniques boost your bathroom’s look, showing off your personal taste.
Step 6: Grouting and Sealing
The last steps include grouting and sealing your waterproof niche. Choosing the right grout is critical for your tiles’ long life and function. Look for a grout that’s strong and matches your tile colors. Also, pick grout that fights off water.
Choosing the Right Grout
When picking strong grout, you’ll see choices like epoxy, urethane, and normal cement grouts. Each type comes with unique benefits:
- Epoxy grout: This type is best at resisting stains and water.
- Urethane grout: It’s flexible, making it perfect for wet areas.
- Cementitious grout: It’s easy to handle and fits most bathroom needs.
Application Tips for a Lasting Finish
After choosing your grout, follow these tips for easy application:
- Make sure all tiles are clean and dry first.
- Spread the grout evenly with a grout float.
- Press the grout into the joints to fill gaps.
- Remove any extra grout with a damp sponge quickly.
- Let the grout set as the maker’s directions say.
Sealing your bathroom tiles after grouting stops water from getting in. Use a top-notch sealant on the grout lines for extra defense against stains and dampness. Taking care of your grout keeps it looking great for a long time.
Adding Finishing Touches to Your Niche
Improving a waterproof bathroom niche needs careful thought about shelving and lighting. These parts not only make the niche more useful but also make it look better. The right shelf ideas can make your space organized and nice looking. Lighting is key in making the niche warm and in showing off your decor.
Shelving Options
When picking shelves, think about both function and style. You might like glass, wood, or metal for a sleek look. Floating shelves are great for saving space but still holding your things. For smaller niches, adjustable shelves can change to fit your items perfectly.
Lighting Considerations
Good lighting can really make your niche stand out. LED strips around the edges give a modern feel and are easy to put up. Another good choice is recessed lighting. It’s hidden but lights up the niche well. Both types make your shelves and decorations look great.

Maintenance Tips for Your Waterproof Niche
Keeping your waterproof bathroom niche looking good takes regular work. Doing maintenance often not only makes it look better but also keeps it from having issues. Good care of your niche means cleaning it regularly and checking it carefully.
Routine Cleaning Practices
Use gentle cleaners that won’t harm your tiles and grout to keep your niche clean. Set up a cleaning routine to stop soap scum and mildew from building up. A mix of vinegar and water works well for a natural, safe clean. Dry the surfaces with a microfiber cloth for a scratch-free, shiny finish. Cleaning your niche regularly makes it last longer and stops bad smells.
Inspecting for Damage
Checking your niche often helps catch problems early. Get into the habit of looking for leaks, cracks, or mildew each month. Also, watch for changes in the color of grout or tiles as they can mean there’s damage beneath. Fix any issues right away to keep your niche in top shape. By inspecting it well, your niche will stay useful and attractive.
Common Mistakes to Avoid When Creating Your Niche
Creating a waterproof bathroom niche improves functionality and style. But many DIY fans make common mistakes. Knowing these pitfalls can save you from costly problems later, making sure your project turns out great.
Overlooking Measurements
One big mistake in bathroom remodels is not measuring correctly. Getting the size and placement right is crucial. If you measure wrong, you might end up with space issues or a layout that looks odd. Always double-check your measurements before you start building.
Neglecting Waterproofing Details
Forgetting to waterproof properly is another mistake. If you skip important waterproofing steps, you might face leaks or mold later. Fully waterproofing your niche keeps it safe and lasting longer. Use the right materials and methods to protect your niche from moisture.
Conclusion: Enjoying Your New Waterproof Niche
Now that your waterproof bathroom niche is done, you can enjoy the upgrade it offers your space. These niches add style and functionality, making your bathroom look better. The hard work and careful planning have made a simple area into a standout feature that shows your style.
Take pride in your renovated space and share your story. It could inspire others to start their bathroom makeovers. Share on social media or community boards to help fellow DIY enthusiasts. Your journey can motivate others to tackle their projects with boldness and creativity.
Enjoy the results of your effort and show off your project. Join the community of DIY home improvers who support and inspire each other. Every new waterproof niche contributes to our collective knowledge and ideas. Your project makes your home more beautiful and inspires others!