About 30% of U.S. hardwood becomes scrap. This fact shows a chance for DIY fans to turn leftover wood into something useful and pretty. By building a painel de ferramentas com sobras de madeira, you cut down on waste. You also get to display your woodworking talent and make a DIY tool organizer that’s just right for your space.
We’ll show you how to make a woodworking tool panel step by step. This panel will not only keep your tools in order but will also add a special look to your workshop or garage. Let’s start this project that combines being eco-friendly with being creative, using what you have in the best way possible!
Why Use Scrap Wood for Your Tool Panel?
Using scrap wood for your tool panel is a smart and eco-friendly move. It not only saves the environment but also adds a unique touch to your workspace. Here’s why scrap wood is a great choice.
Environmental Benefits of Recycling Wood
Recycling wood helps the environment in many ways. It cuts down on deforestation, saves energy, and reduces greenhouse gases that new lumber production creates. Using reclaimed wood lowers the need for new timber, supporting a more sustainable woodworking practice.
Cost-Effectiveness of Using Leftover Wood
Choosing leftover wood saves you money. Often, you can find scrap wood cheap or even free, which makes it a budget-friendly option. This way, everyone from hobbyists to pros can finish their projects without overspending.
Aesthetic Appeal of Natural Wood Finishes
The beauty of natural wood finishes is undeniable. Reclaimed wood has its own unique patterns and colors, bringing life and character to your tool panel. This not only makes your workspace look good but also shows your dedication to eco-friendly practices.
Materials Needed for Your Tool Panel Project
Before starting your tool panel project, it’s important to gather the right materials. Various scrap wood types can be a solid base for your design. Think about using pallets, old furniture pieces, or other leftovers. This approach not only cuts down on waste but also gives your project a unique look.
Types of Scrap Wood to Consider
- Pallets – Ideal for their size and sturdiness
- Old furniture – Reclaimed pieces can provide unique shapes
- Wooden crates – Great for small compartments
- Off-cuts – Perfect for smaller projects and fittings
Essential Tools for Building Your Panel
Collecting the right tools for your project is key for a hassle-free job. Important tools include:
- Saw – For cutting wood to exact sizes
- Drill – Useful for making holes and fastening screws
- Sandpaper – To smooth and finish the wood surfaces
Additional Supplies for Installation
Getting extra supplies ready will make the whole process easier. Be sure to have items like:
- Wood glue – For stronger bonds
- Screws – They hold pieces together
- Paints or stains – To make your panel look better
Designing Your Tool Panel Layout
Making a good tool panel layout helps turn your space into a useful area. First, measure your wall space to know how much room you have for tools. Think about the space and the tools you use often to plan the best layout.
Measuring Available Wall Space
Start by designing tool panel layout with measuring your wall. Record the height and width where you want your tool panel. Look out for windows or outlets that could get in the way. This step ensures your panel fits just right in your space.
Planning Tool Placement for Accessibility
Now, focus on planning tool accessibility. Put the tools you use a lot where you can easily see or reach them. Keep things like hammers close by to save time. Put similar tools together to make your work smoother and keep what you need close.
Visualizing Your Design with Software Tools
Design software can show your tool panel plan before you build it. With these tools, you can try out different layouts and see what works best. A digital look at your designing tool panel layout helps you use your space well and keep tools handy.
Step-by-Step Guide to Building the Panel
Creating a tool panel is fun with scrap wood. This guide shows you each step to make a strong, useful panel for your tools. First, ensure your scrap wood is ready for use to get great results.
Preparing Your Scrap Wood
Inspect your wood for damage first. Sand off any rough edges to make the wood safe. It’s important to check the wood’s quality for durability. After it’s ready, pick all pieces needed for your design.
Assembling the Frame
Now, put the wood pieces together according to your plan. Glue the pieces first, then add screws for strong joints. A solid frame is key to hold your tools safely.
Attaching the Panel to the Wall
Next, hang your panel on the wall. Make sure it’s level. Use strong screws or anchors for heavy tools. Pick the right fasteners for your wall to ensure a secure setup.
This step-by-step guide gives you all you need to work with scrap wood, build a tool panel frame, and install a durable workspace addition.
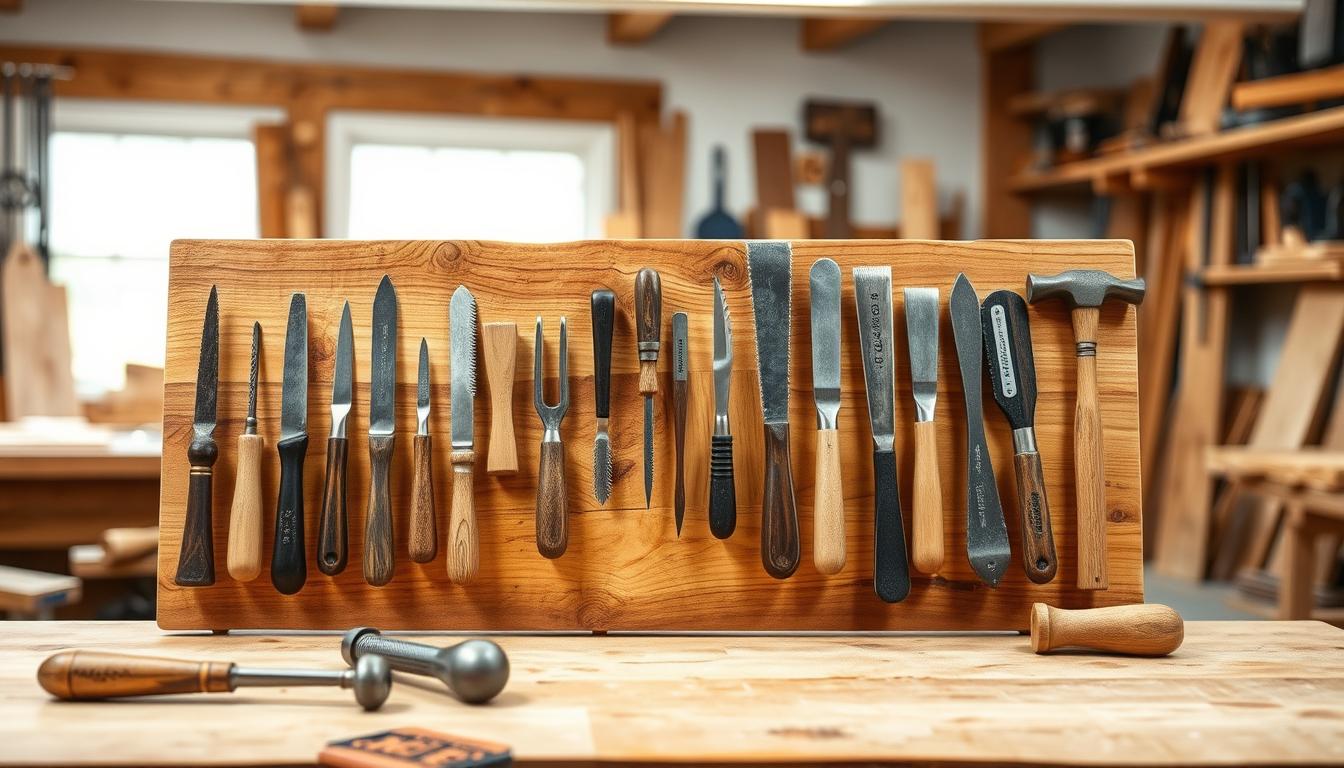
How to Organize Your Tools on the Panel
Getting your tools in order can really make your work area more efficient. Think about how you pick hardware for hanging tools. This helps keep everything tidy and within reach. Start with strong brackets and hooks that suit your tools’ weight and size.
Choosing the Right Hardware for Hanging Tools
Picking the right hardware is key for good organization. Look for tough brackets and hooks made for tools. Hardware stores have many options, but quality is important for them to last. The hardware must hold your tools’ weight and let you get them easily.
Creating Customized Hooks and Holders
Making your own hooks and holders can really improve your tool panel. It lets you make storage that fits every tool just right. Experiment with different shapes and sizes. Make sure every hook fits the needs of your tools. Wood or metal can make them unique and functional.
Grouping Tools for Efficiency
It’s smart to group tools that are similar together. You might sort them by their use, size, or how often you use them. This makes it easier to find what you need and looks nice too. Keep tools you use a lot within easy reach. Store the ones you use less often a bit farther away. This way, your space stays organized and easy to use.
Finishing Touches: Painting and Staining
The last steps in working on your tool panel are super important. They make it look great and last longer. Choosing the best paint or stain can make it look better and keep it protected. Here are some tips to get great results.
Selecting the Right Paint or Stain
First, think about the wood type of your tool panel. Different woods need different paints or stains. Water-based products are easier to clean up and smell less. Oil-based ones have deeper colors and last longer.
- Choose a color that looks good in your workspace.
- Semi-gloss or satin finishes are tougher.
- Try the color on some spare wood first.
Applying Finishes for Durability
To make your tool panel last, you need strong finishes. You’ll have to do a few steps:
- Smooth the surface with sanding.
- Get rid of dust for the finish to stick well.
- Put on the first coat, let it dry, then add more if needed.
Using the instructions from the maker ensures a smooth finish.
Allowing for Proper Drying Time
Being patient while it dries is key. Make sure it’s completely dry before putting tools on it. This makes it look professional and last longer.
Taking the time for these final steps really makes your tool panel better. It will be both useful and nice to look at.

Maintenance Tips for Your Tool Panel
Keeping your tool panel in top shape is key for it to last longer and work better. Regular checks help keep your workspace organized and running smoothly. Follow these tips to help your tool panel stay in top condition.
Inspecting for Damage Over Time
Begin by setting up a regular schedule to look over your tool panel. Look for any damage like splintering wood or screws that have come loose. Fixing these problems quickly stops more damage and makes both your panel and tools last longer. You should check your tool panel at least every few months to find any issues early on.
Cleaning Your Tools and Panel
It’s important to keep both your tools and the panel clean. Dirt and dust can cause damage and make them not work right. Clean the panel often and take care of your tools to keep them working well. Use cleaners that are safe for wood to keep both looking good and strong.
Refinishing When Necessary
If your tool panel’s finish looks old or starts coming off, it’s time to refinish it. Sanding the surface and adding new finish makes your panel look new and protects it from damage. This easy fix makes your tool panel stronger and keeps it looking great.
| Maintenance Task | Frequency | Remarks |
|---|---|---|
| Inspecting tool panel | Every 3 months | Look for splinters, loose screws, or wear |
| Cleaning tools and panel | Monthly | Prevent dust accumulation and maintain functionality |
| Refinishing | As needed | Address dull or peeling finishes to protect the wood |
Creative Additions to Your Tool Panel
Improving your tool panel can significantly boost how well it works and looks. By adding thoughtful and creative touches, you can increase storage, enhance visibility, and make a space that shows off your style.
Adding Shelves for Additional Storage
Adding shelves is a smart move to make your tool panel more useful. You can store things like screws, bolts, and small tools on them. This way, everything you need is easy to find. Think about using adjustable shelves, so you can change your setup as needed.
Incorporating Lighting for Visibility
Good lighting can change the feel of a workspace. Adding lights to your tool panel helps you see better, especially in darker spots. Using LED strips or clip-on lights will light up your tools and workspace so you can work without trouble.
Personalizing with Decorative Elements
You can make your tool panel one-of-a-kind with some decorative touches. Use labels for organizing tools, hang inspiring artwork, or add a bit of color to make the space inviting. Adding personal touches not only boosts your mood but also helps keep the area tidy and fun to be in.

Conclusion: Enjoy Your Custom Tool Panel
Making a tool panel from scrap wood is not just practical. It helps you cut down on waste and save money. You improve your workspace’s organization too. By using leftover materials, you’re not just being eco-friendly. You’re also letting your creativity shine through in a way that’s truly yours.
Reflecting on the Benefits of Your Project
Looking at your finished tool panel, you’ll probably feel proud and happy. DIY projects like this boost your workspace and let you express yourself. Your tool panel isn’t just for holding tools. It’s a part of your creativity, sparking ideas for more projects and enhancements.
Encouragement to Share Your Own Creations
When you start using your tool panel, think about inspiring others with it. Communities grow stronger when creativity is shared. Show off your unique panel to encourage friends and fellow crafters. So, find inspiration, create, and share your work. Every tool panel has its own story that’s worth telling.