Did you know the average American family spends about $2,000 a year on stuff they don’t need? This is often because of disorganization. Imagine using that money for a DIY storage solution instead! Making a stackable organizer can help keep your space tidy. At the same time, it lets you be creative and eco-friendly. This guide will show you how to make a stackable organizer step by step. We’ll make sure you have the right tools and know-how. Your goal is to make it work well and look good too.
Through this guide, you’ll learn to reuse materials and customize your organizer. It will fit just right in any part of your home. Turning a messy space into a well-ordered one becomes easy.
Introduction to Stackable Organizer Boxes
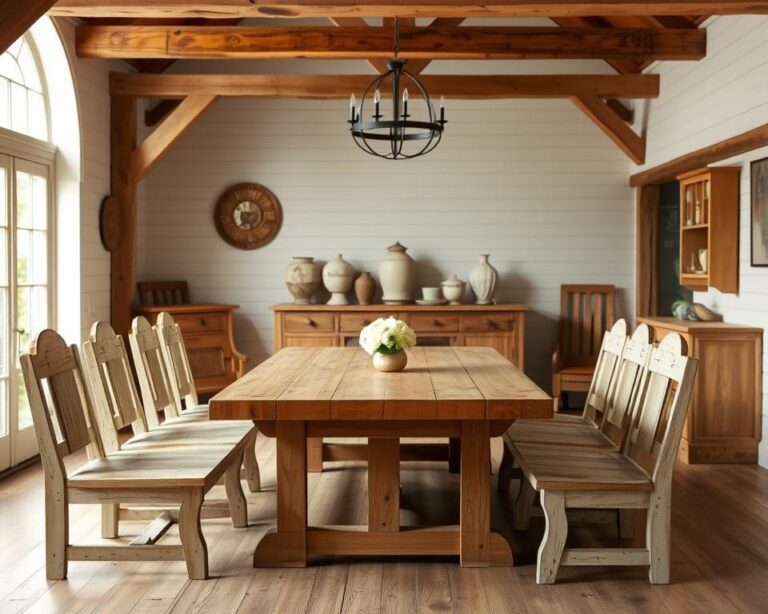
Stackable organizer boxes have become very popular for keeping homes neat. They work as both a crate and a box. They make any room look better and more organized. These boxes are perfect for kitchens, bedrooms, and offices. They are key to a well-organized space.
These boxes help make a room without clutter, showing off order and style. Their design makes stacking easy. This turns any spot into a perfect place for keeping things. They come in different styles and materials. So, they can hold anything from clothes that change with the seasons to supplies for your office.
Today, people love minimalism and designs that are useful. They want things that are not just practical but also look good. Stackable organizer boxes do both. They keep places neat and add to the decor.
Benefits of Using Stackable Organizer Boxes
Stackable organizer boxes offer many benefits for tidy homes. They use space smartly, perfect for anyone wanting a neater place.
Maximize Space in Your Home
These boxes are great at saving space in your home. You can stack them up to keep things neat and within reach. They make good use of corners and overhead spots, turning them into handy storage areas.
Easy to Customize
What’s great about these boxes is how you can make them your own. They come in different materials and colors. So, you can pick what looks best in your home, whether that’s modern or rustic.
Versatile for Various Uses
Stackable organizer boxes are also versatile. They’re good for storing all sorts of items, from kitchen gadgets and toys to clothes and office supplies. This flexibility makes them excellent for organizing every room in your house. You can keep everything tidy and easy to find.
| Feature | Benefit |
|---|---|
| Space Efficiency | Utilizes vertical space, creating additional storage areas |
| Customization | Options in materials and colors mean you can express your style |
| Versatility | Suitable for various items, promoting effective home organization |
Selecting the Right Materials for Your Box
Making a custom stackable organizer starts with picking the right materials. Knowing what’s available helps you decide what’s best for you. Choosing the right wood or other materials affects how your storage looks and works.
Types of Wood to Use
There are many woods that can be perfect for your box. Here are some good choices:
- Pine: It’s affordable and easy to use, offering a natural look for many styles.
- Plywood: Its strength helps it carry heavy things, making it great for stacking.
- Birch: With a smooth look and pretty grain, birch makes your storage look amazing.
Alternatives to Wood: Plastic and Metal
If wood doesn’t fit your plan, consider these:
- Plastic: It’s light and doesn’t get damaged by water, perfect for easy-to-clean crafts.
- Metal: For a tough and cool look, metal is a lasting choice that looks great.
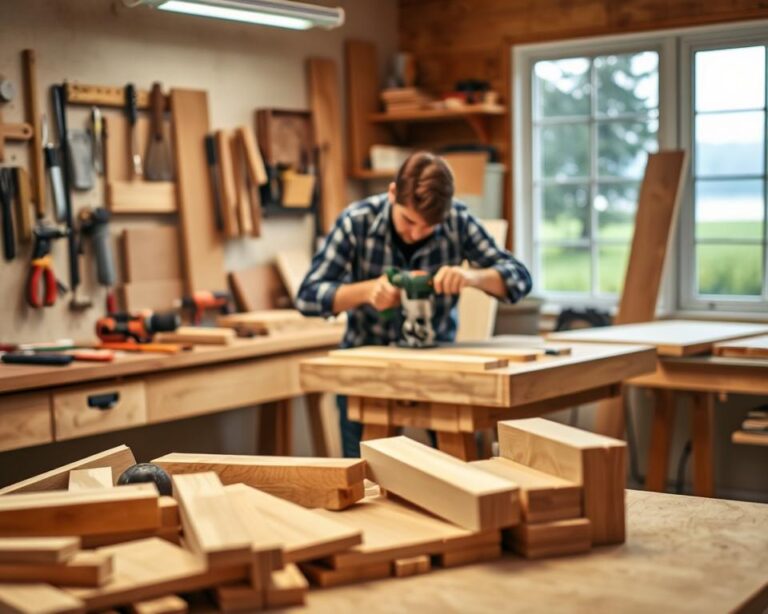
Tools You’ll Need for the Project
The right tools make your organizer look great. You’ll need these:
- Saws: A hand or power saw makes cutting precise.
- Drills: They’re great for making holes and putting things together.
- Sanders: They make edges smooth and safe from splinters.
Step 1: Measuring and Planning
Every DIY furniture project starts with careful measuring and planning. This essential first step lays the groundwork for your whole project, especially when you’re making a stackable organizer box. Knowing your box’s size and purpose helps with better organization.
Determining the Size of Your Organizer
Think about what you want to store and the space you have at home. Measure where you’ll put the boxes to make sure they fit just right. It’s good to focus on both function and the look you want.
Drawing Up a Simple Design
Start by sketching a simple plan of your organizer. This helps you see the size, shape, and layout. Be sure to draw it from different angles—top, side, and front—to get the full picture. You can draw on graph paper for accuracy or use design software for a digital version.
Tips for Accurate Measurements
Making sure your measurements are precise is key to avoid problems later. Always use a good tape measure and check your numbers twice. Mark your material clearly where you’ll cut. This careful planning prevents mistakes when cutting. Remember to account for material thickness, as it changes your box’s final size.
Step 2: Cutting the Material
Once the planning is done, it’s key to accurately cut materials to match your design. Cutting right is vital for precision. This ensures you work safely and effectively. Keep in mind these points as you move to this critical step.
Necessary Cutting Techniques
Choosing how to cut depends on the material. Different tools are best for different jobs:
- Hand saw: Perfect for wood, giving you control.
- Circular saw: Best for big wood or composite pieces, and fast.
- Utility knife: Good for slicing through cardboard or thin plastics.
- Miter saw: Ideal for precise angled cuts in wood.
Safety Tips When Using Power Tools
Safety is crucial when cutting materials. Follow these safety tips closely:
- Always wear safety goggles to shield your eyes.
- Wear ear protection with loud tools.
- Make sure your workpiece is stable to avoid slips.
- Strictly adhere to the tool’s use instructions.
Organizing Your Workspace Efficiently
A tidy workspace helps with cutting and boosts safety. Tips for a better workspace include:
- Keep cutting materials within reach.
- Have a spot for tools to reduce mess.
- Make sure you have enough light to see your work.
- Work on a flat, stable surface for support.
Step 3: Assembling the Base of the Box
Making the base of your stackable organizer box is key. It’s important to use the right ways to put it together. This makes sure you have strong corners that can hold up when stacked. You’ll learn about the best glues and why making holes before screwing parts together stops the wood from splitting. Here, you’ll find great tips for these steps.
Techniques for Strong Joints
For your box to hold up, making strong corners is crucial. There are different ways to join pieces like butt, dado, or lap joints. Each has its own benefits. For example, butt joints are straightforward but might need more support. Dado joints, on the other hand, are stronger and keep pieces aligned. Using these options will make your box more stable.
Choosing the Right Adhesive
Picking the right glue for your box is important. If you’re using wood, wood glue is a good choice. It forms a strong bond as it dries. For plastic or metal, a construction glue meant for many types of surfaces works best. Remember to look at how long the glue takes to dry and how much weight it can support.
Pre-drilling Holes for Screws
It’s important to drill holes before putting screws into wood. If you don’t, the wood might crack, making the corners weak. Use a drill bit a bit smaller than your screw. This makes sure it fits just right. Also, put screws in places where they give the most support. This step is key to making a strong box that can be stacked.

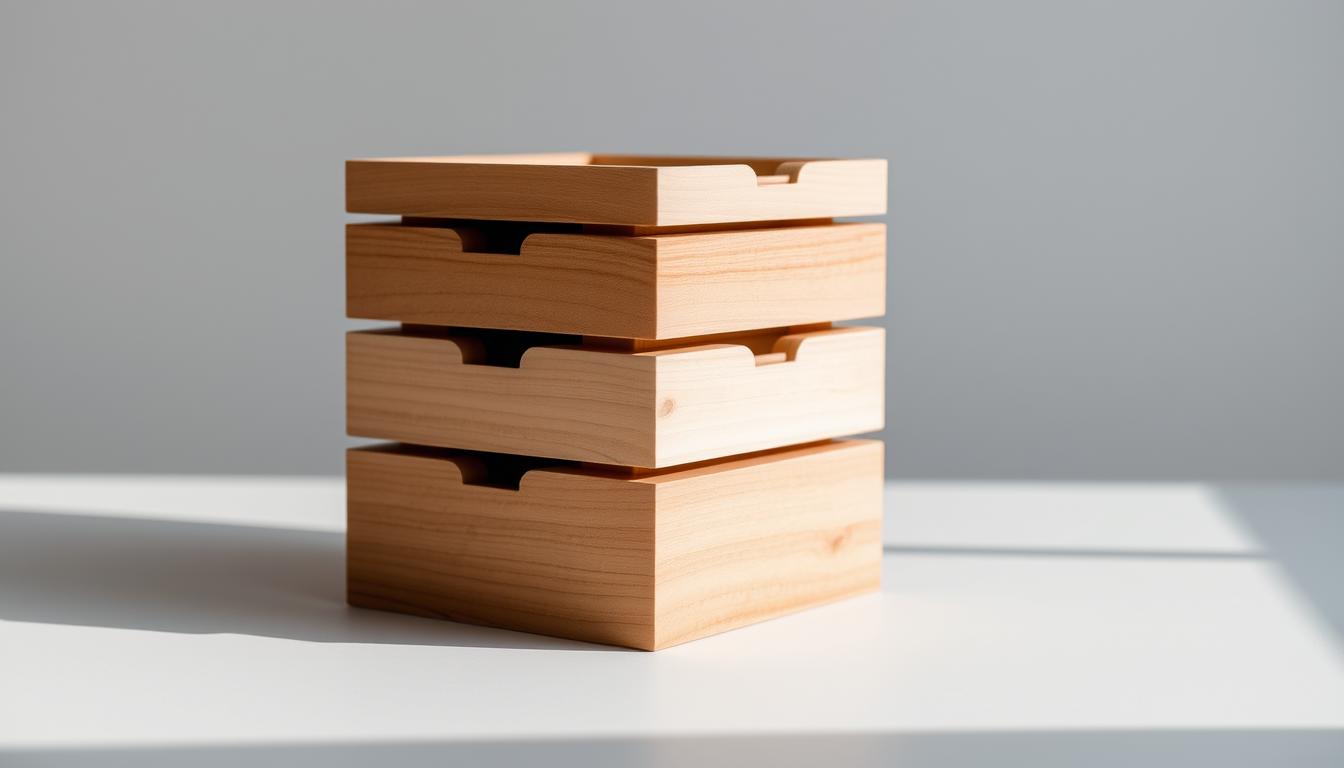
Step 4: Constructing the Stacking Features
Building strong stacking features is key for long-lasting and useful organizer boxes. A good design keeps things sturdy and makes it easy to get to your stuff. We’ll show you how to make parts that stack well and stay put. Let’s dive into how to get the best results.
Designing Stacking Mechanisms
Your stacking features need to keep boxes safely on top of each other. Think about using locking designs or grooves for better steadiness. This way, you get a firm foundation and a tidy setup. Adding things like hooks or latches can stop the boxes from moving around and uses vertical space well.
Ensuring Stability and Safety
Keeping your boxes stable is important to avoid accidents and harm. Use ways to spread out the weight in your design. It’s smart to put heavier things in the bottom boxes to help with balance. Also, putting non-slip materials under each box can help stop them from sliding when they are stacked.
Helpful Tips for Alignment
How your boxes line up matters for looks and how they work. Use a level when putting them together to make sure each box is even. It’s a good idea to pre-drill holes for any hardware needed for alignment. This method makes everything look neater and makes your design stronger.
Step 5: Finishing Touches
Adding finishing touches to your stackable organizer boxes is key. It boosts both function and looks. The last step can change its overall appearance and feel. Focus on DIY creativity. Make sure your boxes meet their needs and show off your style.
Sanding the Edges Smoothly
Sanding the box edges is a must for safety and a nice feel. Use fine-grit sandpaper for a smooth surface. This stops splinters or sharp edges from hurting you. A well-sanded box feels good and looks neat, adding to your project’s beauty.
Choosing the Right Finish or Paint
Picking the right finish or paint brings your boxes alive. You might want a natural look or a bold color. There are lots of choices. Water-based finishes are easy to apply and good for the planet. They protect your boxes and make them look great, showing off your DIY skills.
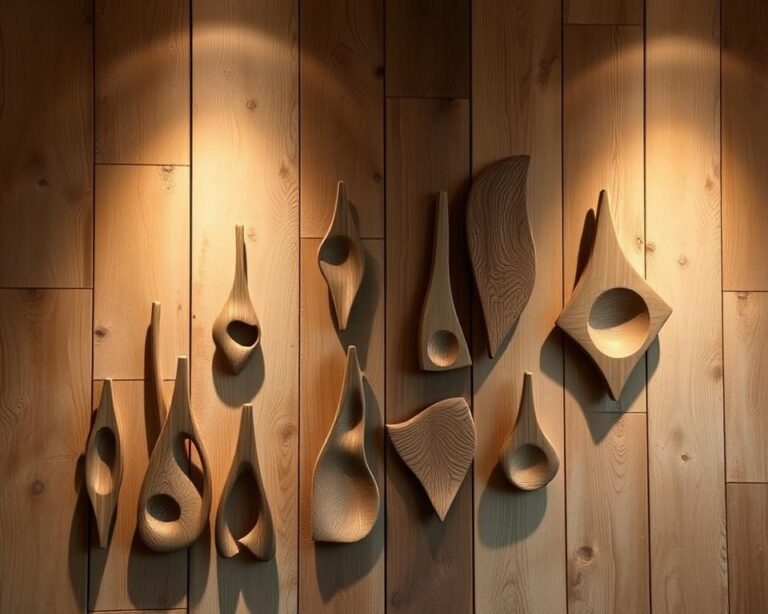
Adding Decorative Elements for Aesthetic Appeal
Adding decorations lets you express yourself. You can use stencils, decals, or paint your designs. These details improve the looks and make your boxes one-of-a-kind. Use your creativity to try different decorations that fit your style.
Focus on these important finishing touches. They turn your stackable organizer boxes from basic storage to lovely home decor.
Organizing Tips for Your Stackable Boxes
Using stackable boxes right can really change your space. With good storage ideas, you can find things easier and use your boxes well. Here’s how to sort items and make your stackable boxes work best.
How to Categorize Your Items
First, look at what you’re storing. Put alike items together for a smooth system. Labels or colors help you spot things fast. This method makes sorting simple and gives everything its place. And, making category lists helps you remember where everything goes.
Best Practices for Stackable Organization
Make the most of vertical space by stacking boxes well. Keep heavy items at the bottom for safety. If you can, choose see-through containers so you can see inside without opening them. This approach helps you organize better and more easily.
Seasonal Organization Ideas
Change your system with the seasons. In cold months, keep winter clothes handy. Put summer wear and decorations up high when you don’t need them. This method saves space and keeps your boxes useful all year.
Maintenance and Care of Your Organizer Boxes
Taking good care of your stackable organizer boxes will make them last longer and work better. Follow easy maintenance advice to keep these boxes useful and good looking for many years. Learn about proper cleaning, fixing common problems, and making changes for new storage needs.
Cleaning and Dusting Procedures
Cleaning regularly helps your organizer boxes stay in top shape. Use a microfiber cloth or a soft brush to dust off gently. For a deeper clean, mix some mild soap with water and use a damp cloth to clean. Make sure to dry them well to avoid moisture damage. This care routine keeps your boxes looking new.
Repair Tips for Common Issues
Fixing problems quickly helps your organizer boxes last longer. Lightly sand and then paint or stain areas with scratches or dents. If joints are weak, use glue or screws to make them strong again. Keep a basic repair kit ready for easy fixes. This makes your boxes stay strong and useful.
Modifying for Future Needs
As your storage needs change, update your organizer boxes too. Add dividers or change how they stack to fit your stuff. If you have bigger items, adjust the box sizes to fit. This helps your boxes stay useful as your needs change. Your organization system can grow and change smoothly.
Creative Uses for Stackable Organizer Boxes
Stackable organizer boxes are great for making your home look and work better. These boxes can change areas into tidier and more attractive places. Here are some clever ways to use them in different rooms at home.
In the Kitchen
In the kitchen, these boxes help keep things neat and efficient. They are perfect for holding spices, utensils, or small gadgets. You can label each box to make cooking and prep quicker. Place them where you can easily get to them.
In the Bedroom
The bedroom often gets messy with clothes, accessories, and personal stuff. Use stackable boxes to save space smartly. They’re great for seasonal clothes, shoes, or other items. Nice-looking boxes can also decorate, helping you organize while keeping it tidy.
In the Office
For home offices or busy workspaces, these boxes are super helpful. They can sort papers, supplies, and tech gear. You can make areas for important things, like documents or chargers. This keeps your area efficient and clear. Customize your labels to fit how you work and cut the clutter.
Where to Buy Materials for Your Organizer Project
Finding the right materials is key for making stackable organizer boxes. This part points out where you can find all you need. From basic DIY tools to special crafting items, we’ll ensure your project is a success.
Local Hardware Stores
Local hardware stores are great for finding materials. Places like Home Depot and Lowe’s have lots of wood, plastics, and metals. Their staff know a lot about which materials work best, helping your DIY projects last longer.
Online Retailers
Online stores like Amazon and Etsy are super convenient. They have a huge selection, and everything gets delivered to you. It’s easy to check prices and reviews, which is perfect when you need specific items not sold locally.
Specialty Craft Supply Shops
Don’t forget places like Michaels and Joann for craft supplies. They have special items to make your organizers look better. You’ll find unique finishes, glues, and decorations to spark new ideas.

Conclusion and Encouragement to Get Started
As your journey in learning to make stackable organizer boxes ends, remember the joy DIY brings. You don’t just organize your space; you also discover what you’re capable of. Each project you complete is a piece of your unique style and creativity.
Now’s your chance to show off your creativity. Feel free to play with colors, shapes, or materials. Your boxes won’t only be practical. They’ll also be beautiful pieces that show your skill. This process lets your imagination fly and makes your space truly yours.
Don’t keep your amazing work to yourself. Share it with friends, family, or online. Your stories and designs might motivate others to start their own DIY projects. So, grab your materials, let your creativity loose, and start your exciting adventure in home organization!