Did you know a great entrance panel can boost your home’s value by up to 10%? It’s true. A stylish panel adds to your curb appeal and impresses your guests. We’ll show you how to make a panel that’s both useful and beautiful, mirroring your style. You’ll pick the best materials and add the perfect final touches. By following this guide, you’ll create a unique entry panel that makes your home stand out.
Are you ready to revamp your entrance with a dazzling, handmade design? Jump in, and let’s start building your dream entrance panel step by step!
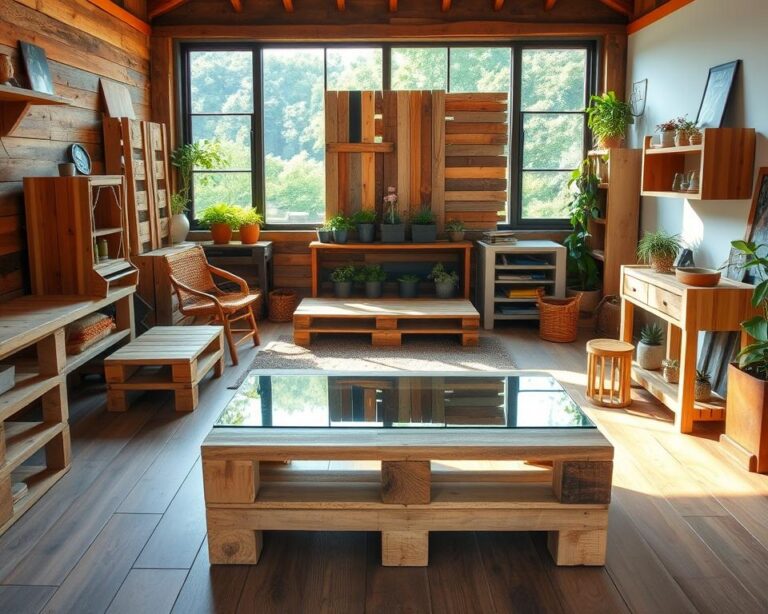
Choosing the Right Materials for Your Panel
Choosing the right materials for your custom entry panel is very important. It affects how long it lasts and how it looks. Think about the wood types that do well outdoors and the finishes that protect your panel from the weather. Knowing your options helps you pick the best for your home’s entrance.
Types of Wood Suitable for Exterior Use
For outdoor panels, some woods are better than others. Cedar, redwood, and pressure-treated pine are top choices. They’re good because they don’t rot easily and bugs don’t bother them much. Each one also looks different, so your panel can be both functional and stylish.
Weather-Resistant Finishes
Using weather-resistant finishes is key to keep your wood materials in top shape. Marine varnish or good outdoor paint keeps moisture, sun, and temperature changes from damaging the wood. This way, your panel stays looking good and strong for a long time.
Other Material Options to Consider
Besides wood, you might think about other materials for your panel. PVC and metal panels are becoming more popular. They last a long time and don’t need much upkeep. These materials can also make your home look more modern. They fit well with many styles and tastes.
Designing the Panel: Finding Your Style
When you’re working on a modern house entrance panel, the design is key. It shapes the vibe of your home, blending old and new styles. Finding the perfect mix can really boost your home’s allure.
Modern vs. Traditional Aesthetics
Modern and traditional styles stir up different feelings. A modern entrance panel is all about simplicity, using clean lines and new materials. It fits well with today’s homes. Traditional designs, though, flaunt detailed craftsmanship and textures. Mixing them right can welcome guests in a special way.
Incorporating Functional Elements
Mixing function with style is smart. You can add useful stuff like house numbers, mail slots, or lights to your panel. These not only look good but are handy too. They light the way and make finding your door easier.
Color Schemes and Visual Appeal
Choosing colors is super important for your panel’s look. Pick colors that go with your house and nature around it. Neutrals offer a timeless feel, but bold colors can be eye-catching. Remember, colors affect how we feel, so pick ones that make people feel welcome.
Measuring Your Space Accurately
Getting the right measurements is key to fitting your panel perfectly. It’s crucial to choose the right tools for measuring. This part talks about the best tools to use, points out common mistakes, and highlights the need to double-check your measurements.
Tools You’ll Need for Measurement
To measure accurately, make sure you have these tools:
- Measuring tape
- Level for ensuring horizontal and vertical accuracy
- Square frames for right angles
- Short ruler for fine adjustments
- Notepad to record measurements
Common Mistakes to Avoid
Even with great tools, mistakes can happen if you’re not careful. Some typical mistakes are:
- Failing to account for uneven surfaces that can affect alignment
- Overlooking existing installation hardware, which may require adjustments
- Not measuring twice to verify dimensions
- Ignoring the impact of expansion or contraction of materials due to temperature
Confirming Dimensions for a Perfect Fit
To make sure your panel fits well, double-check your measurements. Measure every side and angle from multiple points. Doing this prevents any unexpected issues during installation, showing how crucial accuracy is.
Creating a Detailed Plan and Template
Planning your panel project carefully is the first key step. You move from broad ideas to specific design parts this way. A detailed plan acts as a guide, making your ideas come to life smoothly. You’ll learn to draft your design, list materials needed, and plan your budget to avoid extra costs.
Sketching Your Design
Start by imagining your panel’s final look. Sketch out your ideas, paying close attention to important features. This sketch becomes a visual guide of your plan, showing what materials and sizes you need. Keep the scale accurate and include everything you want, thinking about what’s practical.
Drafting a Materials List
Making a list of materials helps you shop and build efficiently. Write down everything required like wood types, paint, and hardware. A full list keeps you from missing important items. Check your design draft carefully to make sure you’ve covered both beauty and function.
Planning Your Budget
Planning your budget helps keep your project affordable. Include costs for materials, tools, and any help you might need. Starting with a budget helps you focus your spending on what really matters. Look up prices online and in stores to set a budget that’s doable for you.
Preparing Your Work Area Before Starting
Before you start your DIY project, it’s vital to prepare your work area. This step includes several important parts. These range from safety measures to setting up an organized system. A well-arranged workspace boosts both safety and productivity.
Safety Precautions to Consider
Having a safe work environment is crucial. Start by putting on safety gear like gloves, goggles, and a dust mask. These protect you from accidents while using tools or materials. Ensure the area is brightly lit and keep the floor clear to avoid trips. Also, knowing where your first aid kit is adds extra security. With these safety steps, you can concentrate fully on your work.
Organizing Tools and Materials
Keeping tools and materials organized is key to preparing your work area. Place your tools close by to reduce interruptions. Store everything neatly using toolboxes, shelves, or pegboards. Organizing your supplies makes it easier to find what you need and keeps you moving forward without losing crucial items.
Setting Up for Efficiency
Arranging your space efficiently can save you a lot of time on your project. Plan a workflow that matches your project steps. Keep large tools at a good height to minimize bending or reaching. Make sure frequently used items are within easy reach. A thoughtfully prepared work area makes your project go smoother and improves your experience.
Step-by-Step Assembly Process
Building your entrance panel is important for both its looks and strength. This guide will help you through key steps. From cutting the materials to putting the panel together and making sure it stays in place properly.
Cutting Your Chosen Materials
First, get your tools and safety gear ready. You need a high-quality saw for precise cuts. Before cutting, measure your materials well to avoid waste. Use a pencil to mark where you’ll cut and follow the right techniques for smooth edges.
Assembling the Structure
After cutting your materials, lay them out as per your design. Start putting the structure together. Attach the vertical parts to the horizontal ones with screws or glue. Make sure the frame is perfectly square before adding anything else.
Securing the Panel in Place
When the assembly is done, it’s time to secure the panel. Choose the right fasteners to ensure it holds well. Test how stable it is by pushing on it lightly. Finish up by applying a coating that protects it from weather.

Adding Finishing Touches to Your Panel
Adding final touches to your entrance panel can make it look and feel special. This step is more than just painting or staining. It’s about adding accessories and decorations to enhance the design.
Painting or Staining Techniques
For a smooth finish, painting or staining needs care. Choose outdoor-friendly paint or stain first. Then, sand the surface and clean it. Use brushes, rollers, or a spray gun to apply. Aim for several thin layers instead of one thick one, allowing drying time between them.
Installing Hardware and Accessories
Adding hardware and accessories gives your panel both style and function. Pick handles, hinges, and locks that match your style. Go for durable materials like brass or stainless steel for beauty and longevity. Use templates to ensure everything is perfectly placed, showing off your craftsmanship.
Personalizing with Decorative Elements
Decorative elements make your entrance panel uniquely yours. You could add house numbers, molding, or custom signs. Choose items that show off your style and match your home. Placing these carefully turns your panel into an eye-catching feature and offers useful info to guests.
Ensuring Durability and Longevity
Keeping your entrance panel in good shape takes work. Regular care keeps your panel strong against bad weather, making it last longer and look better. To protect it from harsh weather, use smart weatherproofing methods. Seasonal care helps maintain it all year round.
Tips for Maintenance Over Time
- Conduct regular inspections for signs of damage, such as cracks or fading.
- Clean the surface with a mild soap and water solution to remove dirt and grime.
- Reapply finishes as needed to ensure optimal weather resistance.
Protecting Against the Elements
To guard your panel against moisture, UV rays, and big temperature changes:
- Use sealants specifically designed for exterior applications.
- Implement overhangs or awnings to shield from direct rain and sun exposure.
- Consider adding a protective coating that defends against UV damage.
Seasonal Adjustments or Treatments
As the seasons shift, so should your panel care plan. For top-notch seasonal care:
- Inspect and repair any winter damages before summer sun exposure.
- Refinish the panel in spring to prepare for the summer heat.
- Adjust volumes and ventilation during fall to reduce moisture accumulation.

Installation Tips for the Perfect Fit
Installing your entrance panel is the last step. It’s important to install it correctly to keep it stable and working for years. Making sure it lines up right not only looks good but helps it last longer. Knowing what problems might come up lets you fix them early.
Techniques for Secure Mounting
Good installation starts with the right foundation. Make sure the area is clean before you start. Pick the right screws and anchors that can hold your panel’s weight. Using a level helps ensure your panel is straight. This careful approach avoids issues and future fixes.
How to Align Your Panel with Surroundings
Getting your panel to fit in with everything else is key. First, look around to see where the best spot for your panel is. It should match with what’s already there. Measure both side-to-side and up-and-down adjustments. A panel that lines up well makes the space welcoming.
Troubleshooting Common Installation Issues
Sometimes, things don’t go as planned. Walls that aren’t even can mess up your panel’s alignment. Shims can fix that. If your panel isn’t sitting right, check how you mounted it again. Knowing these common hiccups helps your installation go smoothly.
Conclusion: Enjoy Your New Entrance Panel
As we end our journey of creating your entrance panel, let’s recall the main steps. Selecting proper materials, taking accurate measures, and making smart design choices are crucial. Each step helps make a beautiful entry for your home. This recap shows that the DIY project is easy and rewarding.
Feel free to get creative with your entrance panel’s design. Experiment with different styles, colors, and materials that fit your taste. Your entrance panel can show off your unique style and what your home means. So, inject your personality into the panel you’ll make.
Finally, putting time and work into your entrance panel boosts your home’s outside look. A well-made entryway not only looks good but also feels welcoming. Be proud of your effort and enjoy how your entryway changes for the better.