Did you know more than half of DIY fans think being organized is key to success? Having a neat place for your tools, like a custom tool box, is crucial. It not only keeps your space tidy but boosts your creativity and work speed. Follow the right steps, and making your caixa de ferramentas personalizada can be fun and fulfilling.
This guide will help you build a unique tool chest that fits your needs. We’ll cover choosing materials and adding your own flair. By following our detailed methods, you’ll create a tool box that reflects your personal style. So, let’s start our journey into making custom tool boxes and improve your DIY skills!
Introduction to Custom Tool Boxes
Building a custom tool box is both fun and practical. It lets you store tools your way, making everything neat. A toolbox made just for you improves how you work with your tools.
People who want their storage to fit their needs will love this. Customizing your box helps you work faster by keeping things easy to find.
Benefits of a Personalized Tool Box
A toolbox just for you is not only cool to look at but also smart. It makes sure every tool has a place, cutting down on mess. You won’t waste time looking for what you need anymore.
Such a toolbox changes to fit all your tools, big or small. This organized approach boosts your work speed and makes any job seem easier. It’s great for both pros and hobbyists.
Who Needs a Custom Tool Box?
Many people can use a custom toolbox. Carpenters need durable boxes for their varied tools. Electricians like boxes with special spots for tiny items.
Crafters find them great for organizing art supplies like brushes and scissors. Really, anyone looking for a perfect way to store tools would want one.
Selecting the Right Materials
Choosing the best materials is key to a great custom tool storage. Each one, like wood, plastic, and metal, has its own benefits. These affect how long your tool box lasts, its weight, and how it looks.
Wood vs. Plastic vs. Metal
Wood adds a traditional, warm vibe. It’s tough and easy to make your own. Compared to others, it handles daily use well. But, it’s heavier and needs care to prevent water damage.
Plastic is lighter and available in many colors and styles. It stands up to most weather and is wallet-friendly. Yet, it may not hold up as long as wood or metal.
Metal is strong and long-lasting. Perfect for heavy tools, it doesn’t bend or break easily. Though it costs more and is heavier, metal offers the best weather protection.
Tools You’ll Need for Construction
Get these tools ready before you start building your tool storage:
- Saw (hand saw or power saw)
- Drill
- Measuring tape
- Clamps
- Screwdriver (manual or electric)
- Sandpaper or sander
Having the correct tools is important for good woodworking. A well-stocked workspace improves your custom tool box’s quality.
Designing Your Tool Box
Building the perfect tool box means thinking about both its size and shape. It should not only store your tools but also show off your style. Knowing what you need to store is key when you start this project.
Choosing the Size and Shape
To pick the right size and shape for your tool box, look at what tools you have. Think about these points:
- Tool Inventory: Check what tools you have to figure out the size you need.
- Usage Frequency: Make sure often-used tools are easy to get to.
- Portability: Think if you want something light to carry or a big one that stays put.
Understanding your needs helps you create a special tool box just for you.
Adding Personal Touches
Making your tool box unique is all about adding your touch. Here are some fun ideas:
- Colors and Patterns: Pick colors you like or patterns that match your style.
- Personalized Engravings: Put your name or a favorite quote on your tool box.
- Interior Organization: Set up the inside with dividers or sections that work for you.
Drawing your designs first helps you see your ideas. A simple sketch can really help plan your custom tool box.
Tools Required for DIY
Starting a DIY project means you need the right tools. You’ll want everything from simple hand tools to more complex power tools. Having these tools makes building things easier and more fun.
Essential Hand Tools
Every DIY project starts with basic hand tools. These tools are key for precision and control in many tasks. Here’s what you’ll need:
- Screwdrivers – Get a set with both flathead and Phillips heads.
- Hammers – You’ll need a claw hammer for nails and a rubber mallet for softer taps.
- Wrenches – Have both adjustable and fixed types for various nuts and bolts.
- Measuring Tape – It’s crucial for getting exact measurements.
- Utility Knife – Makes cutting different materials easy.
Power Tools You Might Consider
Hand tools are important, but power tools can make your work easier. These tools cut down on hard work and help you finish big projects faster. Think about using these tools:
- Drills – Go for cordless drills from brands like DeWalt and Makita for flexibility.
- Circular Saws – They’re great for quick, straight cuts in lumber.
- Orbital Sanders – Perfect for getting surfaces smooth.
- Jigsaws – Best for cutting curves in many materials.
- Air Compressors – Useful for running nail guns and other air-powered tools.

Buying high-quality hand and power tools can improve your work and spark your creativity. Choose wisely to take your projects to the next level.
Step-by-Step Assembly Process
Building your handcrafted tool box takes careful planning. First, get your materials ready. Then build the base, and attach the sides. Each step is key to making a strong custom tool cabinet.
Preparing the Materials
Start by measuring and cutting your materials. Make sure you have the base, sides, and supports ready. Keeping accurate measurements is crucial for a sturdy tool box.
Constructing the Base
Now, put the base of your tool cabinet together. Use wood glue and screws to make it strong. The base is the main support, so make sure everything lines up right.
Securing the Sides
Then, it’s time to attach the sides to the base. Clamp the sides in place and use screws to secure them. This ensures the box can hold your tools without trouble. Make sure all joints are tight for your tool box to last a long time.
Painting and Finishing Touches
Painting your custom toolbox is super fun and lets you be creative. Picking the right paint makes sure it looks how you want and lasts a long time. You have to think about looks and how well it holds up. Also, consider what your toolbox is made of.
Choosing the Right Paint
Knowing which paint to use is key. For wooden toolboxes, oil-based or latex paints are great. They cover well and are easy to use. For plastic ones, special spray paint sticks best. And for metal, use paint that fights rust, meant for outdoors. Always put on two layers to make it last.
Adding Protective Coatings
After your paint dries, add a protective layer to keep wood strong. Use polyurethane varnish or clear lacquer to fight off scratches and moisture. This keeps the colors bright and adds shine. Apply it carefully for the best results. And don’t forget to let it dry as the label says.

Customization Options
Creating your own toolbox is more than just putting it together. It’s about enhancing its function and look. You can choose from special engravings to smart organization systems. These options help make your toolbox truly your own.
Personalized Engravings
Engravings make your toolbox special and add identity. You can pick names, beloved quotes, or designs that show who you are. Adding these personal touches connects you to your toolbox. It turns it into more than a place for storing things.
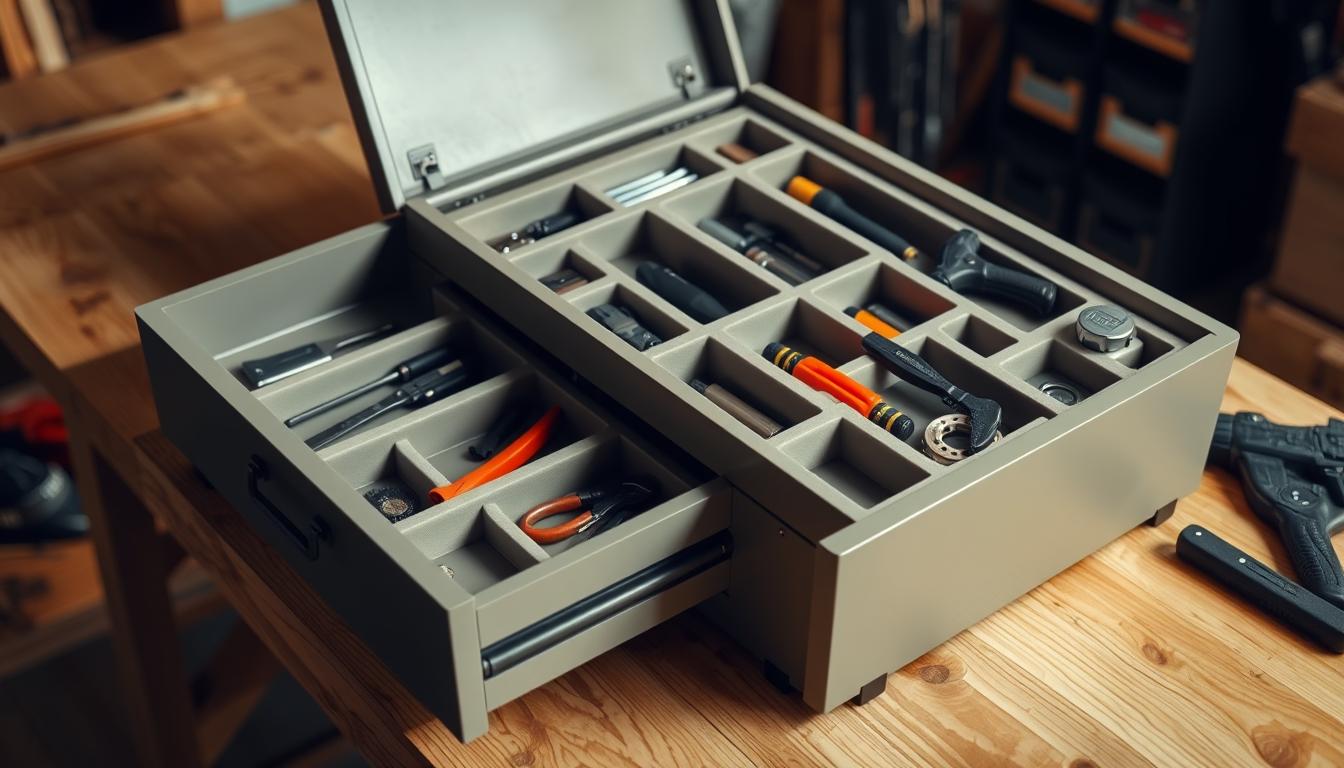
Adding Compartments and Organizers
Using space wisely is key for customized tool storage. Adding compartments and organizers turns your toolbox into a work of art that’s also useful. Think about these ideas:
| Compartment Type | Description | Best For |
|---|---|---|
| Drawer Dividers | Adjustable dividers offering separation for small tools. | Screws, nails, and bits |
| Cushioned Inserts | Foam cutouts to protect delicate tools. | Chisels, measuring instruments |
| Tool Trays | Removable trays for quick access to often used items. | Hand tools, screwdrivers |
| Magnetic Strips | Attached magnets for securely holding metal tools. | Wrenches, pliers |
By choosing these compartment options, you make your toolkit more practical. Everything stays organized and easy to find, making your customized toolbox even better.
Tips for Maintenance
Keeping your custom tool box in good shape doesn’t just make it last longer. It also ensures your tools stay in the best condition. Following some key tips for tool box care can make a big difference. Giving your tool storage regular care improves its function and look.
Cleaning Your Custom Tool Box
To keep your custom tool storage in top shape, choose a cleaning method that’s right for the material. If you have a wooden box, wipe it with a damp cloth, then a dry one to remove dust and moisture. For metal tools, skip harsh cleaners. Use mild soap and warm water instead. Clean plastic tool boxes with vinegar and water for a deep clean. Cleaning your tools before putting them back keeps dirt from building up.
Repairing Damage Over Time
It’s important to check your tool box regularly for signs of damage. For wooden boxes, small scratches and dents can be fixed with wood filler or polish. Metal tool boxes might need paint touch-ups or rust remover to stop corrosion. Fixing minor damage early keeps your tool storage in good shape and looking great. Also, regularly check for loose handles or hinges to keep everything working well.
| Material | Cleaning Method | Repair Techniques |
|---|---|---|
| Wood | Damp cloth, dry cloth | Use wood filler or polish |
| Metal | Mild soap, warm water | Touch-up paint, rust remover |
| Plastic | Vinegar and water mix | Check seals, apply adhesive for cracks |
By following these simple tips for tool box care, you can greatly enhance your custom tool storage’s life and performance. Cleaning regularly and fixing issues fast means your tools stay organized and in great condition for many years.
Where to Find Inspiration
Looking for the perfect DIY inspiration for tool boxes can make your work stand out. You’ll find plenty of innovative designs and smart ideas for your custom tool box across various platforms. Websites, forums, books, and magazines are packed with unique tool box design ideas that match your style and needs.
Websites and Forums for DIY Projects
Online communities are treasure troves for DIY fans. Sites like Pinterest and Reddit are full of creative tool box projects shared by users. Forums such as ToolGuyd and DIY Stack Exchange offer a chance to talk to other builders. Here, you can swap ideas and get helpful tips, sparking new ideas and improvements for your project.
Books and Magazines on Tool Boxes
Traditional sources like books and magazines are also great for inspiration. Titles like “The Complete Book of Shop Made Tools” and issues of “Wood Magazine” come with detailed guides and beautiful pictures. They give deep insights into various styles and how to build them. Take notes and sketch ideas from these as you start your tool box project.
Conclusion and Final Thoughts
Making your own custom toolbox is a rewarding venture. It combines practicality with your own flair. In this guide, we showed you how to pick materials and design a box that meets your needs. By choosing its size, shape, and special features, your toolbox will not just be useful. It will also show off your personal style.
Recap of Key Steps
You learned how to prepare materials and build a strong base in our step-by-step guide. Adding unique details like engravings makes your toolbox stand out. It becomes a symbol of your skill. The journey matters as much as the toolbox you end up with.
Encouragement to Get Creative
Let your creativity shine as you start this DIY project. There are no hard rules. It’s all about making something that suits you. So, grab your tools and let your imagination guide you. Be proud of making a toolbox that’s all yours. With each project, you turn your ideas into a tool storage you’ll love for a long time.